Related Posts Plugin for WordPress, Blogger...
Showing posts with label She Treats. Show all posts

Tuesday, April 23, 2013

Bake some Heath Bar Biscotti


A few months ago we had a family over for dinner and she brought me a lovely gift basket filled with treats...  special teas, espresso powder, etc. and these delightful homemade biscotti!  The recipe has been around a while, apparently she got it out of the Washington Post and it can be found online in several places.  I adapted it by leaving the butterscotch extract out and replacing the chopped up candy bar with Heath English Toffee bits. I also used pecan halves...  not sure why the original recipe called for whole pecans.  Worked just fine and tasted great!

You'll need:

  • 1/2 cup vegetable oil
  • 1/2 cup granulated sugar
  • 1/4 cup light brown sugar, packed
  • 1 1/2 teaspoons vanilla extract
  • 3 eggs, lightly beaten
  • 3 cups all-purpose flour
  • 1 3/4 teaspoons baking powder
  • Pinch of salt
  • 1 1/2 cups Heath English Milk Chocolate Toffee Bits 
  • 1/2 cup pecan halves

Heat oven to 350 degrees F. Line a large baking sheet with parchment paper.

In a mixing bowl, cream the oil, granulated and brown sugars together until well blended. Stir in vanilla extract. Blend in eggs.

Mix flour, baking powder and salt together and then fold into batter. Fold in toffee bits and pecans.

Place batter on baking sheet (it will be thick and a little sticky) and form it into two logs, each about 10 to 12 inches long about 3 inches in width.  (Flatten the logs slightly -- it's more like a long rectangle.)  Bake in preheated oven until set, about 25 minutes. Cool very thoroughly.

This was the first batch, tiniest bit underdone.  The second batch got a bit more brown.

With a sharp knife (serrated might work well for you, experiment or you could also try a pizza cutter), slice the logs in strips (about 1/2 to 3/4 inch wide) and return them, cut side down, to baking sheet. Bake in preheated 350 degree F oven first on one side, about 12 minutes, then turn over and bake other side about 5 minutes, or a little longer to desired level of brown.  If you bake them a bit longer they will be a bit more crunchy and taste more caramelized, but watch carefully so you don't over-do it and burn them! Cool well. 

Wednesday, April 10, 2013

She Has Five Favorites!

Today I am joining in with Moxie Wife and others and writing about a few things I'm loving right now.

1.  Green tea to start my day.  Particularly one that has some kind of fruity flavor added to it.  
I've been a coffee-first-thing-in-the-morning-please-don't-talk-to-me-until-I've-had-my-cup person for decades (pains me to say it) but recently I've replaced that first cup of joe with green tea.  
Makes me happy.
Purple Açai and Blueberry Green Tea Superfruit
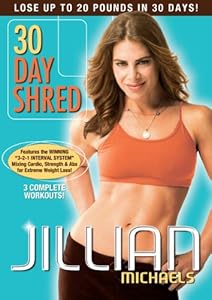
2.  Jillian Michaels on the DVD player.  Yeah, she's kinda annoying, and I guess I wouldn't say that She Personally is a Favorite, but her workout program is.  Surprise surprise, breaking a sweat every day (even only for 20-30 minutes) really really improves my mood and overall feeling of well-being.  Yep, you heard it here.  First probably.


3.  Lest you think I'm so last decade with Favorites #2 and #3 let me add Call the Midwife to the list.  Totally awesome show.  I cry over each and every episode.  Watch it online or get the DVDs from Netflix, whatevs, just Watch This Show.


Learn More About the Show


4.  Peperoncini

Current fave way to consume is in a wrap sandwich -- get yourself a wrap of some sort (edible), spread it with a bit of mayo, layer deli turkey, some kind of cheese if you want, spring mix or other kind of green stuff, and then a bunch o' peperoncini. Sprinkle with black pepper, roll up, and enjoy!


5.  Um, I've owned this little gizmo (Pampered Chef Mini-Whipper) for years -- in fact I own two of them -- and only just realized what it's most especially good for.  Even the company's write-up doesn't tell you that if you pour some milk into a small saucepan and put it over medium heat and use this guy to whisk up the milk for all of maybe 20 seconds that you'll have perfectly frothed milk that you can continue to warm and then use to make an awesome homemade latte!  (Just add a few ounces of hot strong coffee or espresso -- I make mine from instant and it works great!) Why I didn't realize this I have no earthly idea.  So don't bother buying yourself a battery-operated milk frother thingy, just use this, which you probably already have and didn't know what it was good for.  Or maybe you do and I'm just the last person to realize...  yeah probably that's it. 


Head on over to Moxie Wife to read up on more Five Favorites!

Sunday, January 20, 2013

Chocolate Chip Cookie Perfection

If you have been reading our posts for awhile, you may remember a couple years back we shared some tips and ideas for Chocolate Chip Cookies.

I have to be honest (sorry sisters!) but even these tips did not solve my cookie struggles. When I bake the much-desired choco-chip cookies at my house, I always cringe. They are just greasy and flat and crunchy and just NOT what I was craving.

My kids still eat them and so does the hubby, but I am just not satisfied.

So for awhile now I have been trying many varieties and methods with inconsistent results.

That is, until today.

I am a new woman.

If you are like me and you are an epic failure in the world of choco-chip-cookie baking, you have GOT to go to this website and read the whole thing. And look at the pictures. She has awesome pictures.

And then after you do that... bake her cookies.

Design Mom's 
Version of the Perfect Chocolate Chip Cookie

Ingredients:
1 cup (8 oz.) butter, at room temperature
1 1/2 cups brown sugar
1/2 cup white sugar
2 large eggs, at room temperature
1 Tbsp. pure vanilla extract
2 3/4 cup all-purpose flour
1 tsp. baking soda
1/2 tsp. salt
2 cups semi-sweet chocolate chips

Instructions:
Preheat oven to 350 degrees F. Line two baking sheets with parchment paper or silicone baking mats.
Beat butter with an electric mixer until creamy. Add the brown sugar and beat for 5 minutes on high speed until light and fluffy. Add the eggs, one at a time, beating for another minute after each addition. Add the vanilla and mix well.

Whisk together the dry ingredients. Add the dry ingredients to the creamed mixture in two or three additions, mixing on low speed just until the flour is incorporated. Stir in the chocolate chips using a silicone spatula or the mixer on low speed.

Using a small ice cream scoop or tablespoon, drop balls of dough onto the prepared baking sheets, leaving a few inches of room between them. Bake for 10-12 minutes, rotating baking sheets front to back and top to bottom halfway through baking time. Let cookies cool on baking sheet for about 10 minutes before transferring them to a cooling rack.

Makes about 3 dozen cookies.

Monday, December 24, 2012

Chocolate Wafer Cookies with Peppermint Frosting


These are so simple and so yummy.  I am not sure where I got the idea, on a website several years ago, I think.

Here's what you need:
  • container of plain old white frosting
  • peppermint extract (optional)
  • bag of peppermint candies (like these)
  • package of chocolate wafer cookies (Nabisco brand "Famous Wafers" -- see here)
Dump the frosting into a bowl.  Remove the wrappers from about a dozen of the candies and put them into a heavy-weight zip bag.  Cushion the bag on a kitchen towel and have at it with a rolling pin -- you want to crush the candies into small bits.  It might take a while, make sure you are working a solid surface that won't be harmed with all your whacking!  When you have managed to get out all your stress and have a bag full of small bits of candy, pour the bits into the bowl and mix up with the frosting.  Add a dash of peppermint extract, if you have it, to taste.  I have made these without the extract and not missed it, but the extract adds some peppermint "zing" which is nice, if you do have it.  Taste the mixture and add more candy to taste.

Then carefully open the package of cookies (they break easily) and spread about a heaping tablespoon-full of the mixture onto the flat side of one wafer.  Gently press another wafer (flat side to the frosting) onto the top.  Place the cookie into a air-tight container -- when you have all the cookies made put them into the refrigerator for an hour or two to set up.  Keep in the fridge, they taste best cold.

Enjoy!

Oh, you will have leftover frosting.  I'm sure you can think of something to do with it.

Wednesday, October 31, 2012

Chocolate Covered "Pumpkins"

Today we made some chocolate covered pretzels. We used small pretzel knots, dipped in white chocolate that we had colored with orange food coloring. I got this idea from this website and you can view it for a more detailed explanation of how to make these treats. She has great pictures, too!

What you need:
  • Bag of pretzels
  • Orange Food Coloring (I used this stuff because it's awesome)
  • White Chocolate Chips (we bought a small Nestle bag)
  • M&Ms (just the green ones)
  • Oil and/or Butter
Melt your chocolate. I did 1 minute in the microwave and then another 30 seconds until it seemed ready. Don't go too fast or try to melt it all in one go, it won't work! Add some food coloring until you achieve the shade of orange you want. I added some butter and oil to my chocolate to thin it out. The original recipe states that you should use 1 Tbsp of shortening for about 10 oz of chocolate. I estimated and just added until I felt that the chocolate was runny enough. The reason I didn't use shortening is because we don't buy that stuff in our house! I had fine results. The chocolate could have maybe been a bit smoother had I used shortening, but it looks good to my 3-year old and that is all that really matters to me!

Dip the pretzels in the chocolate, lay them out on a cookie sheet and stick a green M&M in the top for a "stem." I let my boy do this part. He had great fun trying to get the M&M to stand up right. He put them wherever he wanted, which was fine with me, but ideally you would want them in the bend at the top of the pretzel to look most like a pumpkin.

If you accidentally overheat your chocolate, you may be able to save it by using these tips.


Another great thing about this activity is you can teach your child at the same time! While I worked on melting the chocolate, etc. my son sorted the M&Ms by color! He chose to eat the brown ones when we were all done!


Friday, October 26, 2012

Make Cookie Ghosts (from Nutter Butters)


Maybe you've made these before, maybe not -- if you have, then here's a reminder, if you haven't, then try this fun treat!

You'll need:
  • a package of Nutter Butter cookies
  • a package of "almond bark"
  • a handful of mini chocolate chips 
Follow the melting directions on the back of the package of Almond Bark.  I suggest doing about half the package at a time and use the microwave.


Then go ahead and coat the cookies with the melted "bark" (so, just a comment, it's not almond and it's not bark, so why is it called that?), one at a time.  Some people just dip the cookie, thereby covering it about 2/3 of the way, but we went for the full coverage method.

Immediately decorate the little ghost with a few mini chocolate chips -- eyes only or add a nose, if desired (both approaches are pictured...  just trying to be helpful here.)

Place the cookies on a waxed paper lined cookie sheet until they harden.

That's it!

So easy, so yummy.  So treat-y!


Wednesday, May 2, 2012

Make Indoor S'mores

Another one from the archives...  since it's a wee bit early/late for outdoor fires, go ahead and make this treat for yourself your children today!

1 graham cracker (split in 2) + 10 mini-marshmallows (or 1 regular marshmallow) + 10 chocolate chips + 15 secs in the microwave = yummy!

(Put the marshmallows & chocolate on one graham cracker half, on a microwaveable plate.  Melt in the microwave -- start with 10 secs and adjust according to your microwave.  Then top with another graham cracker half.  Smooosh down and enjoy!)

photo taken October 2008

Thursday, April 19, 2012

Yum's the Word


One of the things I love about being in the UK.
Scones with Cornish clotted cream and jam.
For breakfast, afternoon tea... or anytime really.

[For more on Devonshire or Cornish Cream Tea go here.]

[And here is a recipe for making your own clotted cream at home!]

Friday, April 6, 2012

Mini No-Bake Nutella Cheesecakes

My 13-year-old made these the other day.  Just the ticket to use up the Nutella we had in the pantry.  So yum and creamy and Nutella-y.  You'll love 'em!


[Adapted from recipes found here and here.  Their photos are much prettier.]

You'll need:
  • 12 chocolate sandwich cookies, crushed into crumbs
  • 3 T butter, melted
  • 1 (8 oz) package cream cheese, softened
  • 2/3 c Nutella
  • 1 t vanilla extract
  • 1 1/2 c heavy whipping cream
  • 2 T powdered sugar
In a medium bowl, mix together the chocolate sandwich cookie crumbs and melted butter.  Then press equal amounts of the mixture into the bottom of 4-6 small glass bowls, individual serving size.  (We used 6 of these 1-cup storage bowls but any small bowl or glass dessert cup/dish could work).

In a large bowl, beat the cream cheese with an electric mixer until light and smooth.  Add the Nutella and mix together until combined well and smooth.  Add the vanilla and mix again to combine.

In another bowl, whip the cream and powdered sugar together until stiff peaks form.  Using a rubber spatula, gently fold the whipped cream into the cream cheese and Nutella mixture until well blended and no streaks remain.

Spoon the filling into the individual glass dishes on top of the crust.  Cover and refrigerate until serving, 2 hours if you can wait that long, and up to 8 hours.  (Keeps in the fridge for a day or two.  Well, in theory, that assumes you don't have any living, breathing humans around because if you do these will get eaten way before that day or two passes.)