Related Posts Plugin for WordPress, Blogger...
Showing posts with label She Bakes. Show all posts

Wednesday, October 5, 2016

Pumpkin Banana Muffins

Baking muffins is seriously one of my most favorite things to do this time of year. And muffins are my kids' favorite thing for me to make! I think that they love the individual portion sizes that muffins provide them. They can get them all by themselves from the container and they are ready to eat with no prep from Mom! So of course I love that, too!

If you have been here before, you have seen our recipe for Pumpkin Chocolate Chip Muffins. Now, when I make anything-pumpkin, I usually LOVE to make my own pumpkin puree  but let's be real... now that I have four kids and three of them are in school, there's just not always enough time in the day to do everything from scratch that I want to! So, I buy the pumpkin puree in a can at my local grocery store. Problem is: it's never the right amount of oz for the recipes I am making! I always have leftover puree and I never know what to do with it... until now! I have found another KILLER muffin recipe that solves all my issues with pumpkin in a can!

Pumpkin Banana Muffins

Not only does this recipe only require 3/4 cup of pumpkin puree (the EXACT amount I had sitting in my refrigerator) but it also takes a couple of overripe bananas that I had lying around. This is the best. It is so moist and incredibly flavorful and it combines my kids' two favorites into one glorious muffin.

The recipe is easy to follow and comes out mostly the way it is described. In my experience the muffins needed a little bit longer. I used my stone bake-ware and jumbo muffin cups. It did make 12 large muffins. I love how the recipe has you start at 425 and then lower to 350 - it helps the muffins rise and round up on the top.

Now I have the perfect after school snack for my kids to enjoy for several days a day or so! Actually I am not even sure if they will last until tomorrow... I think someone is eating one right now as I type this.


Tuesday, April 23, 2013

Bake some Heath Bar Biscotti


A few months ago we had a family over for dinner and she brought me a lovely gift basket filled with treats...  special teas, espresso powder, etc. and these delightful homemade biscotti!  The recipe has been around a while, apparently she got it out of the Washington Post and it can be found online in several places.  I adapted it by leaving the butterscotch extract out and replacing the chopped up candy bar with Heath English Toffee bits. I also used pecan halves...  not sure why the original recipe called for whole pecans.  Worked just fine and tasted great!

You'll need:

  • 1/2 cup vegetable oil
  • 1/2 cup granulated sugar
  • 1/4 cup light brown sugar, packed
  • 1 1/2 teaspoons vanilla extract
  • 3 eggs, lightly beaten
  • 3 cups all-purpose flour
  • 1 3/4 teaspoons baking powder
  • Pinch of salt
  • 1 1/2 cups Heath English Milk Chocolate Toffee Bits 
  • 1/2 cup pecan halves

Heat oven to 350 degrees F. Line a large baking sheet with parchment paper.

In a mixing bowl, cream the oil, granulated and brown sugars together until well blended. Stir in vanilla extract. Blend in eggs.

Mix flour, baking powder and salt together and then fold into batter. Fold in toffee bits and pecans.

Place batter on baking sheet (it will be thick and a little sticky) and form it into two logs, each about 10 to 12 inches long about 3 inches in width.  (Flatten the logs slightly -- it's more like a long rectangle.)  Bake in preheated oven until set, about 25 minutes. Cool very thoroughly.

This was the first batch, tiniest bit underdone.  The second batch got a bit more brown.

With a sharp knife (serrated might work well for you, experiment or you could also try a pizza cutter), slice the logs in strips (about 1/2 to 3/4 inch wide) and return them, cut side down, to baking sheet. Bake in preheated 350 degree F oven first on one side, about 12 minutes, then turn over and bake other side about 5 minutes, or a little longer to desired level of brown.  If you bake them a bit longer they will be a bit more crunchy and taste more caramelized, but watch carefully so you don't over-do it and burn them! Cool well. 

Wednesday, April 10, 2013

Have You Made Your Own Granola Yet?

If you haven't tried this granola yet you are really missing something!

It is so yummy and crunchy and texture-y... Plus it's fun to play around with and add stuff to!

This week's version includes dried apples and sunflower seeds.

Leave a comment on Facebook if you have some ideas of tasty things to add to granola!

Sunday, January 20, 2013

Chocolate Chip Cookie Perfection

If you have been reading our posts for awhile, you may remember a couple years back we shared some tips and ideas for Chocolate Chip Cookies.

I have to be honest (sorry sisters!) but even these tips did not solve my cookie struggles. When I bake the much-desired choco-chip cookies at my house, I always cringe. They are just greasy and flat and crunchy and just NOT what I was craving.

My kids still eat them and so does the hubby, but I am just not satisfied.

So for awhile now I have been trying many varieties and methods with inconsistent results.

That is, until today.

I am a new woman.

If you are like me and you are an epic failure in the world of choco-chip-cookie baking, you have GOT to go to this website and read the whole thing. And look at the pictures. She has awesome pictures.

And then after you do that... bake her cookies.

Design Mom's 
Version of the Perfect Chocolate Chip Cookie

Ingredients:
1 cup (8 oz.) butter, at room temperature
1 1/2 cups brown sugar
1/2 cup white sugar
2 large eggs, at room temperature
1 Tbsp. pure vanilla extract
2 3/4 cup all-purpose flour
1 tsp. baking soda
1/2 tsp. salt
2 cups semi-sweet chocolate chips

Instructions:
Preheat oven to 350 degrees F. Line two baking sheets with parchment paper or silicone baking mats.
Beat butter with an electric mixer until creamy. Add the brown sugar and beat for 5 minutes on high speed until light and fluffy. Add the eggs, one at a time, beating for another minute after each addition. Add the vanilla and mix well.

Whisk together the dry ingredients. Add the dry ingredients to the creamed mixture in two or three additions, mixing on low speed just until the flour is incorporated. Stir in the chocolate chips using a silicone spatula or the mixer on low speed.

Using a small ice cream scoop or tablespoon, drop balls of dough onto the prepared baking sheets, leaving a few inches of room between them. Bake for 10-12 minutes, rotating baking sheets front to back and top to bottom halfway through baking time. Let cookies cool on baking sheet for about 10 minutes before transferring them to a cooling rack.

Makes about 3 dozen cookies.

Saturday, December 8, 2012

Jalapeno Cheese Muffins

The intro to this post has nothing to do with Jalapeno Cheese Muffins.  Well, indirectly it does.  Stay with me.


My husband has always been fascinated by the frozen bag of seafood.  You've probably all seen it.  It has crab and shrimp and squid, clams and bits and pieces of who knows what all else.  He typically wanders around the grocery store and manages to get himself lost.  I usually find him in the frozen food aisle, holding the frozen bag of who-knows-what-alls from the sea.  Staring at it and smiling.  "What do you suppose is REALLY in here?  Could you make something with it?  That'd be fun, don't you think?"  I usually scowl and poke him and say, ew, put that back, no, I don't know what's in there.

Well, three weeks ago, I caved.  I threw the bag in the cart and subsequently stared at it almost every time I opened up the freezer for my predictable chicken.  Then a few nights ago I thought....okay.  What am I going to do with this?  Seafood bisque!  It can't be much harder than clam chowder.  I grabbed the cream and tomato sauce and started chopping up all the what's-its, trying not to actually identify what anything was, beyond the shrimp.  I'm pretty sure there were some tentacles, but I plowed on through and got it all chopped and in the pot.  And you know what?  The bisque was divine.  (Recipe for Seafood Bisque to come in a future "She Who Makes" post!)

Now, I thought, what to serve with the bisque?  Then it came to me.  JALAPENO CHEESE MUFFINS.  And you know what else?  It was the perfect combination.  Two words:  Yum.  Mers.

I found this recipe on www.food.com.  I modified it slightly, though. It wouldn't be a "Laura" recipe, if it wasn't modified.  =)

Jalapeno Cheese Muffins

Mix together in a large bowl:
2 cups flour
1 tablespoon baking powder
1/2 teaspoon baking soda
1 tablespoon white sugar
1/2 teaspoon salt
2 cups grated cheddar cheese
1 tablespoon very finely minced onion
Whisk together in a separate, smaller bowl:
1 cup Plain Greek yogurt
1/4 cup melted butter
2 eggs
3 tablespoons finely chopped jalapeno peppers
Add wet ingredients to dry ingredients and stir until evenly moistened.  The muffin batter will be very dry.  It will have a sort of soft, pizza dough consistency.  With a non-stick spray of your choice, grease a muffin pan.  Or use muffin cups, but grease the inside of the muffin cups.  I think a baking stone muffin pan works best.  Generously fill with the muffin batter.  Bake at 400 F for 15 minutes.  Makes 12 muffins.


Thanks to Food.com for the inspiration for this recipe.


Monday, December 3, 2012

Cinnamon Roll Tree

Here's a fun idea for Christmas morning...

Or in our case, Thanksgiving morning. At our house we always have Cinnamon Rolls for breakfast because it's really easy to make them ahead and throw them in the oven when I wake up before I start getting ready to cook everything else. It's special and it's tasty and it holds my family over until the next time to eat!

But there's plenty of time to enjoy this fun treat between now and the end of the year, so here's what you do:

Make a 1 lb loaf of bread dough. I use my breadmaker to make it super quick with easy-clean-up. You could also buy frozen bread dough if you wanted to, but you would need to thaw it out...

Roll out the bread dough on a lightly floured surface into a 12x8-inch rectangle.

In a small bowl, combine 1/3 cup brown sugar, 1/4 cup sugar, 1 Tbsp cinnamon.

Spread 2 Tbsp softened butter over the dough.

Sprinkle the sugar mixture on top of the butter and roll the dough up starting with the long side. Pinch it closed and slice it into 12 pieces.

Arrange in a tree shape (see photo) on a baking sheet. Cover with saranwrap and place it in the fridge overnight. If you are making it for that day, skip this step and just rise the dough for an additional 30 minutes before baking. If the dough has been in the fridge, you may need additional rise time. Just try to get the dough to double in size.

Bake at 350 for 18-20 minutes.

Transfer to a serving platter in the same arrangement you baked it in. Top with Cream Cheese Frosting. I use this recipe for my frosting. Yum!
 
Thanks to Taste of Home for the inspiration!

Thursday, October 4, 2012

Pumpkin Molasses Cookies

My kids have been begging me for cookies. I guess they are ready for my baking to be in full-swing again! I took the summer off, but I think that it's time.

Anyway, so with the begging there were requests for chocolate chip cookies, but this Mama doesn't have any chips around, so I went looking for a recipe that would make everyone happy -- cookies for the littles and ingredients that work for me!

I love the name of the website where I found this recipe: My Baking Addiction.

Now go make these cookies that just scream "fall!"

Pumpkin Molasses Cookies (makes 24)

Whisk together in a bowl:
2 1/3 cups flour (I changed this and used 1 1/3 white flour and 1 whole wheat)
2 tsp baking soda
1/2 tsp salt
1 Tbsp pumpkin pie spice (didn't have this so I threw in cinnamon and nutmeg and some other stuff)
1/4 tsp black pepper
1 Tbsp flaxseed meal (I added this... just 'cause.)

In your mixer, beat for 2 minutes:
1 stick butter (8 Tbsp), room temp
1 cup brown sugar, packed
1/4 cup molasses
2/3 cup pumpkin puree

Add 1 large egg and beat for another minute.
Reduce speed to low and pour in dry ingredients until it is all "just mixed" together. Do not over-beat. The dough will be very soft and sticky. Divide the dough in half and put each piece in plastic wrap. Place them in the freezer for 30 minutes. Heat oven to 350 degrees. Put 1/2 cup sugar in a bowl. Take out one package of dough and divide into 12 pieces. Roll each piece into a ball, toss it around in the bowl of sugar and press it onto a cookie sheet with the bottom of a glass. Shoot for 1/4 to 1/2 inch thick. Bake for 12-14 minutes. Cool for 5 minutes before transferring to a cooling rack. Do the same thing for the second package of dough.

Now I am going to go make some hot apple cider to go with them.......

Wednesday, October 3, 2012

Gingerbread with Lemon Cream Cheese Frosting


[Sorry!  No photo -- but you probably know what gingerbread looks like.]

You'll need:
  • 1/2 c unsalted butter, softened (probably could use salted and then omit the salt)
  • 1 c sugar
  • 2 large eggs, well beaten
  • 1 c milk
  • 1 c molasses (don't use blackstrap, just regular ol' molasses from the grocery store)
  • 2 1/2 c flour
  • 1/2 tsp baking soda
  • 1/8 tsp salt (omit if using salted butter)
  • 1 T ground ginger
  • 1/2 tsp cinnamon
  • 1/4 tsp ground cloves
  • 1/4 tsp ground nutmeg
Preheat oven to 350 degrees.  Butter a 9x13" baking pan and line the bottom with parchment paper cut to fit (or just make sure you grease the pan really well!)

Cream butter and sugar together.  Add the beaten eggs and mix well.  Add the milk and molasses.

Sift the dry ingredients into the liquid ingredients and beat well.  Pour batter into the prepared pan.

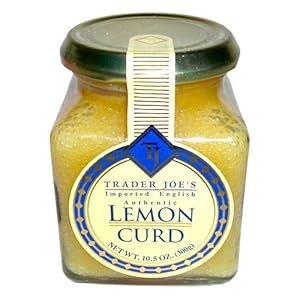
Trader Joe's Imported English Authentic Lemon Curd Great on Breakfast Goods, As a Dessert Topping, As a Filling for Tarts ,Pastries Etc.
this is a good one, if you have TJs nearby
Bake for 30-35 minutes or until the gingerbread begins to pull away slightly from the sides of the pan.  Let cool before serving.

I like to make a quick cream cheese-lemon curd frosting to make this gingerbread really special:

Mix together really well:
  • 1 pkg cream cheese, softened
  • lemon curd, to taste -- about half a jar or so?
Spread this yummy mixture on the gingerbread -- trying really hard not to eat too many spoonfuls straight from the bowl. With the addition of the frosting this gingerbread is best cold so store it in the fridge until ready to serve!

p.s. If you wanna get all pretty and fancy (and you happen to have a lemon in your fridge), you can sprinkle fresh lemon zest on top. Yum!

Gingerbread recipe source: Beat This! Cookbook
Frosting source:  unknown, saw somewhere online...


Monday, September 24, 2012

What I do with all that Zucchini...

Last Christmas when the parents and in-laws asked my husband and me for Christmas gift ideas we told them we would just like to receive money. We had something very specific in mind to do with it... we wanted to buy one of these:

If you don't have a food processor, get out your Christmas Wish List and add one to it right now, this minute! Seriously, it's one of the best kitchen power tools I have. I think I may even get rid of my small chopper and blender, I love it that much! We use it for any number of things: cutting butter into something I am baking, canning, preparing to freeze veggies, shredding cheese, mixing dough, chopping onions, making salsa, making baby food, blending refried beans, the list goes on and on........... So, I bring this up now because it has become a life saver for dealing with my garden. This week things were a little crazy with our schedule and we couldn't get out there to pick vegetables for several days. There were several baseball bats zucchinis out there for me to use up.

Here is where my food processor comes in ---- I can really quickly chop the zucchinis into large pieces that will fit into the mouth of the processor and run them through the shredder disc to get cup after cup of shredded zucchini!

What am I going to do with it when I am finished?

I love to put my zucchini into bags by the 2-cupful so that when I am ready to prepare a recipe that calls for it, I can grab one bag per 2-cups and let it thaw on my counter ahead of time. I usually put them in smaller bags and then put those into a large gallon size bag in the freezer, labeled and dated. Zucchini will be good for 9 months in the freezer or 14 months in a deep freezer. Do your very best to get all the air out of the bags.

TIP: Use a soda straw, insert it into the bag and zip it all the way closed up to the straw. Suck out the air and then pinch the straw closed and continue sealing the zip as you pull the straw out. You can do that or you can invest in one of those fancy vacuum sealing machines... but that might have to wait for next year's Christmas Wish List...

We make a lot of casseroles and soups in our house. Adding a cup or two of shredded zucchini will totally fool the kids (even the hubby sometimes) and can be a great way to add more veggies to your diet without affecting the flavor or texture of the dish.

We also love to eat Zucchini Bread. I prefer to make it in muffins these days so that my little people can just reach into the refrigerator and pull one out of the container. I use this recipe, which makes 2 regular sized loaves of bread, or in my case--24 muffins.

Several summers ago, a mother of some of my piano students shared this recipe with me and I give it to you now:

Chocolate Zucchini Cake
1/2 cup butter
1/2 cup oil
1 3/4 cups sugar
2 eggs
1 tsp vanilla
1/2 cup buttermilk
2 cups zucchini, peeled and grated
2 1/2 cups flour
4 Tbs cocoa
1/2 tsp cinnamon
1 tsp baking soda
1 tsp baking powder
1 (12oz) bag chocolate chips
Brown Sugar
  
Cream butter, oil and sugar. Add eggs, vanilla and buttermilk and mix well. Add zucchini, flour, cocoa, cinnamon, baking soda and baking powder and mix well. Stir in one cup of the chocolate chips. Pour into a greased 9x13 pan. Top with remaining chips and some brown sugar. Bake in a 350 degree oven for 30-40 minutes or until a toothpick inserted in the center comes out clean.


Tuesday, April 17, 2012

Apple Pie Bars

Thanks, familyfun.go.com!
Here's another great way to make awesome homemade treats for hubbies & kids to pack in their lunches so they can have forkless-desserts on the go!

I am not completely positive what the purpose of the crushed cereal** is in this recipe, but I am glad for an excuse to use up the crumbled bits at the bottom of the bag that no one wants to eat in their bowl! Save them up and bake this yummy treat!

From Family Fun ... visit their website for more GREAT recipe ideas to make with your kids!


          FOR THE CRUST:
  • 2-1/2 cups flour
  • 1/4 teaspoon salt
  • 1 cup butter
  • 1 egg
  • Milk (about 2/3 cup)
FOR THE FILLING:
  • 1-3/4 cups cornflakes**
  • 8 cups peeled and sliced cooking apples (see first tip below)
  • 1 cup sugar
  • 1-1/2 teaspoons cinnamon
  • 1/2 teaspoon nutmeg
FOR THE TOPPINGS:
  • 2 tablespoons sugar
  • 1/2 teaspoon cinnamon
  • 1 cup confectioners' sugar
  • 2 tablespoons milk
  • 1/2 teaspoon vanilla extract

  1. In a medium-size bowl, stir together the flour and salt. Using a pastry blender or two knives, cut the butter into the flour until the mixture is crumbly. Separate the egg yolk and white, reserving both parts. Beat the yolk in a liquid measuring cup, then add enough milk to measure 2/3 cup and blend well. With a fork, stir together the yolk-milk mixture and flour mixture until the ingredients form a sticky dough. Halve the dough and flatten each half into a 3/4-inch-thick disk. Cover the disks in plastic wrap and refrigerate them until well chilled, at least 30 minutes.
  2. Heat the oven to 350 degrees. Pour the cornflakes into a plastic bag and use a rolling pin to lightly crush them.
  3. On a sheet of waxed paper, roll one portion of dough into a 15-1/2- by 10-1/2-inch rectangle. Transfer the dough to an ungreased 15- by 10-inch jelly roll pan. Sprinkle the crushed cereal over the dough, then layer on the apple slices.
  4. Roll out the remaining dough as in Step 3. In a small bowl, mix the sugar, cinnamon, and nutmeg for the filling. Sprinkle the mixture over the apples, then lay the dough on top. Use the tines of a fork to seal the dough edges.
  5. In a small bowl, use a fork to beat the reserved egg white until foamy, then brush it over the dough. In another small bowl, stir together the sugar and cinnamon for the topping and sprinkle it on the crust.
  6. Bake the pastry until lightly browned, about 50 to 55 minutes. Let it cool for an hour, then mix the confectioners' sugar, milk, and vanilla extract to make a glaze and drizzle it over the top. When the dish has completely cooled, cut it into bars and serve.

Wednesday, April 11, 2012

Bake some (Fast and Cheap!) Plain Muffins

Plain Muffins
  • 1/4 cup oil
  • 1 medium egg
  • 1 cup milk
  • 1/2 cup sugar (or 1/4 cup honey)
  • 1/2 tsp salt
  • 1 Tbsp baking powder
  • 2 cups flour
In a large bowl, combine the oil, egg, milk, sugar and salt. Mix well. Measure in the bp and the flour until the dough is moistoned. Do not over-mix. Spoon batter into greased muffin cups and bake at 400 degrees for 20 minutes.

These muffins go great with everything! And since they are plain, go ahead and experiment by adding whatever you want to them! Let me know what you think...

Monday, April 2, 2012

Bake Bread for Dinner Tonight

Super easy to make with your stand mixer and dough hook, and has a very nice flavor and texture.


The recipe makes about 4 loaves that are the size you see here. It's a really good bread to have with homemade soups, stews, or chili.  [I once made about 30 loaves for a home school coop "medieval feast".  You know, the old sopping-up-with-bread-because-we-don't-have-utensils thing.  That was fun.]  This bread (as you'd expect) freezes really well.

Simple and Yummy Bread

You'll need:
  • 6 c all-purpose flour
  • 2 packages yeast (or 4 1/2 t)
  • 2 T sugar
  • 1 t salt
  • 2 1/2 c water
  • 2 T butter
Here's what you do:
  1. Heat the water and butter in a glass bowl (I use the microwave) to approx 120 degrees. (I use a candy thermometer to check the temperature.)
  2. Mix together the flour, yeast, sugar, and salt in a stand mixer bowl with the dough hook attached. 
  3. Add the heated water and butter to the mixer bowl. 
  4. Knead the mixture for a couple of minutes until the dough comes together -- you might need to add a bit more flour but don't overdo it. 
  5. Place the dough in a greased bowl, cover, and let it rise until doubled. 
  6. Punch down and form into loaves -- I divide the dough into 4 pieces and then roll each piece into a rope that I then tie into a knot (see photo). This makes a nice individual loaf.  Place each knotted loaf onto a seasoned baking stone or lightly greased baking sheet. Cover with a towel and let rise again for a bit. 
  7. Bake in 400 degree oven until nicely browned, about 20-25 minutes for this size loaf.

Monday, March 26, 2012

Apricot-Orange Scones

You could easily substitute another dried fruit for the dried apricots.
Apricot-Orange Scones
[adapted from this recipe here]
  
You'll need:
  • 2 3/4 c all-purpose flour
  • 1/3 c sugar
  • 3/4 t salt
  • 1 T baking powder
  • 1/2 c cold butter (1 stick)
  • 1 c chopped dried apricots
  • zest of 1 orange
  • 2 large eggs
  • 1/2 c half & half
  • 2 t milk
  • 2 T sugar
Directions:
  1.  Whisk together the flour, sugar, salt, and baking powder in a large bowl.
  2.  With a pastry blender, cut the butter into the dry ingredients, until the mixture is unevenly crumbly.  Per the original recipe, "it's OK for some larger chunks of butter to remain unincorporated."
  3.  Stir in the dried apricots and orange zest. 
  4.  In a separate mixing bowl, whisk together the egg and half & half.
  5.  Add the liquid ingredients to the dry ingredients.  Stir until the mixture is moistened and holds together. (But be careful not to overmix!)
  6.  Line a baking sheet with parchment paper if you have it.  Otherwise grease the baking sheet.
  7.  Dump the mixture onto the pan and gently separate into two halves.  Carefully shape each half into a flat circle about 6" in diameter -- don't touch the dough more than you need to make a circle and gently flatten it. 
  8. Brush each circle with milk (about 1 tsp per circle) and sprinkle with sugar (about 1 T per circle).  Using a knife or pizza cutter, cut each circle into 6 equally-sized wedges.  Carefully separate the wedges so they aren't touching while baking.
  9. If you have time, place the baking sheet with the scones on it (uncovered) into the freezer for 15-30 minutes while you are heating your oven to 425 degrees.
  10. Bake the scones (directly from the freezer) for 20-25 minutes.  They should be lightly browned and the edges shouldn't look wet or unbaked.
  11. Remove from oven and cool slightly.  Scones can be kept in an airtight container at room temperature for a few days, or freeze and remove as needed.

Wednesday, March 21, 2012

Homemade Fruit Breakfast Bars

Update: I made a second batch this morning and got a picture!
These ones are made with my canned apple pie filling.
Recipe Credit:
This recipe comes from Family Fun Magazine, August 2009 issue.
I am reposting the original recipe, which can be found here.

"This hearty bar is easily handheld for breakfast on the go. We used berries in our version, but it's equally tasty with peeled and chopped peaches, nectarines or plums."

Awhile back I tore pages from my collection of magazines of things I may like to try. This recipe was one of them but I have never made it... mostly due to the fact that it was called Oatmeal Berry Breakfast Bars and I never have fresh berries in my kitchen! Then I read the above quote at the top of the recipe and was super excited to try it with my Canned Peaches! All the ingredients are staples you will have in your pantry and if you have canned peaches... well it will feel like you are getting a bunch of Fruit Bars for free!

**My hubby ate these up so quick, I couldn't get a picture of my Peach Bars, but you can see what another version looks like in the above photo.**

For the crust and toppings, you will need:
1 cup flour
3/4 cup brown sugar, firmly packed
1/2 tsp salt
1/2 cup unsalted butter, cold and cut into small cubes [I had salted butter, so I just used less salt!]
2 1/2 cups quick-cook oats
2 Tbsp apple or orange juice [I had neither, but I did have a fresh orange that I just squeezed into the bowl!]

For the filling:
1/4 cup brown sugar, firmly packed
2 Tbsp flour
Pinch of salt
3 1/2 cups fresh fruit [peaches]
1 Tbsp lemon juice

Heat your oven to 375 degrees. Grease a 9x13 pan. Add the flour, brown sugar and salt to your food processor and pulse a few times to combine. Then add the butter and pulse some more to form coarse crumbs. Add the oats and pulse 2-3 more times to combine. Remove 1 1/2 cups of this mixture and set it aside (for the topping). Add the juice to the remaining amount that is in the food processor. And pulse until moistened. Dump it into the pan and press firmly and evenly with your fingers. For the filling, whisk together the sugar, flour and salt, then add the fruit and juice and toss until the fruit is coated. Distribute over the crust. Sprinkle the reserved mixture on top and bake until the top is golden brown--about 35 to 40 minutes. Cool the pan on a wire rack for 2 hours and then cut it into 16 bars. Store in the refrigerator in an air-tight container.

Grab a breakfast on the go or send one with hubby!

Tuesday, March 20, 2012

Hot Milk Cake

I was able to snap a photo of the last piece before it got eaten.
This yummy cake is easy, special enough for company-coming, but not too fancy or complicated that you can't make it just 'cause you feel like baking a cake.  The texture is lighter than a pound cake but the flavor is similar.  My mom made this so many times while we were growing up, usually to take to a church supper or potluck.

Hot Milk Cake

You'll need:
  • 4 eggs
  • 2 c sugar
  • 2 c flour
  • 2 t baking powder
  • 1 c milk
  • 1/2 c butter (1 stick)
  • 1 t vanilla
Heat the milk with the stick of butter on medium-low heat, until the butter melts (do not scald the milk!).  Set aside to cool for a few minutes.

Meanwhile, put the eggs in your mixer bowl and beat well. Add sugar and beat.  Add flour and baking powder and mix.  Add milk/butter and mix.

Pour into a greased (or sprayed) 10" bundt cake pan and bake at 350 degrees for 45-50 minutes.  (If you have a cake tester use that to see if it's done, otherwise just bake until it springs back when pressed.  You don't want to overbake!)

We chose today's post for our weekly link-up!

Please visit our She Links Up! page and check out the other places you can go for great recipes, ideas and encouragement!

Thursday, March 15, 2012

Pumpkin-Chip Bread

From Laura...  Yes, it’s true.  I admit it.  I cannot leave well enough alone.  I come across any recipe and I just can’t help myself, I need to change it.  So here’s the BH&G recipe for Pumpkin Bread, with my spin on it.  Okay, I sort of totally changed it.  And I know it’s not Fall, but it’s still cold in the mornings, so force yourselves to enjoy it in spite of the impending Spring.  I know you can do it.
Laura's Pumpkin-Chip Bread

Preheat oven to 350 degrees.  Makes 2 loaves
You'll need: 
  • 3 cups sugar 
  • 1 cup applesauce (I used homemade, unsweetened) 
  • 4 eggs 
  • 2 1/3 cups all-purpose flour 
  • 1 cup granola-type breakfast cereal (I used “Nature’s Path Organic Flax Plus Granola”) 
  • 2 tsp. baking soda 
  • 1 1/2 tsp. salt 
  • 2 tsp. cinnamon 
  • 1 tsp. ground nutmeg (I used freshly ground – yum) 
  • 15 oz. canned pumpkin 
  • 1/3 c. dark chocolate chips (semi-sweet is fine, too) 
  • 1/3 c. butterscotch chips (if you don’t like or don’t have, just use 2/3 c. chocolate chips)
  • Optional:  a couple of handfuls of the granola cereal (to put on top just before baking)
In large bowl, beat together, sugar, applesauce and eggs.  Set aside.

 
In another bowl, combine flour, cereal, baking soda, salt, cinnamon, nutmeg.

Add flour mixture to sugar mixture. 


Beat in pumpkin.  Stir in chocolate & butterscotch chips.


Spoon batter into 2 loaf pans. Just before baking, take a handful or two of the granola cereal and sprinkle it over top of the loaves.


Bake for 55 -65 minutes, until golden brown and set.

Tuesday, March 13, 2012

Soft Pretzel Bites

I have been experimenting with several different recipes for homemade soft pretzels. Tried this one last week and my husband just loves them! I think he especially likes that he can just grab a handful and throw them in his lunch. They are a bit time consuming, but the recipe makes A TON of them so they will last for awhile!

My 20 year old niece was sleeping over my house the afternoon I made these so we just sat and chatted as I mixed up the dough, rolled it out and baked them up. So, grab a friend and a cup of coffee and spend some quality time making something your family will enjoy!

1 1/2 cups warm water
2 Tbsp brown sugar
2 1/4 yeast (or 1 package)
3 ounces unsalted butter, melted [I only had salted, so I cut back on the salt I added]
2 1/2 tsp kosher salt
4 1/2-5 cups all-purpose flour
Veggie Oil
3 quarts water
3/4 cup baking soda
1 whole egg, beaten with 1 Tbsp cold water
Coarse Sea Salt

Combine water, sugar, yeast and butter in your stand mixer's bowl. Mix with dough hook until combined and let sit for 5 minutes. Add the salt and flour and mix on low speed until combined. Increase speed and knead dough until it is smooth and pulls away from the sides of the bowl. If the dough appears to be too wet, add more flour, 1 Tbsp at a time. Remove the dough and place it on a flat surface to knead in a ball with hands. Oil a bowl and let the dough sit in there, turning once, covered for 1 hour until it doubles in size.

Preheat oven to 425 degrees. Bring 3 quarts of water to a boil and add the baking soda.

Remove the dough from the bowl and divide into 8 pieces. Roll each piece into a long rope and cut the rope into 1-inch pieces. Boil the pieces [bites] in the water solution, several at a time, for 30 seconds. Remove with a slotted spoon and place on a baking sheet. Brush the tops with egg wash and salt.

Bake for 15-18 minutes until golden brown.

Visit Two Peas & Their Pod for a more detailed version of this recipe and some great ideas for dipping and seasoning these soft pretzel bites!

Monday, February 27, 2012

Bake Chocolate-Pistachio Biscotti


Definition of yummo:  chocolate and pistachios.  Pair that with biscotti and you have a major, big-time yummo.  More specifically, Chocolate Pistachio Biscotti, which I first made years ago when I saw it in one of my Martha Stewart magazines.  Here’s the recipe, with my photos along the way.  Oh, and don’t eat too many pistachios and chocolate chips while you’re making it, you’ll get a tummy ache. -- Laura

Recipe from Martha Stewart Living, February 2001 
CHOCOLATE PISTACHIO BISCOTTI

Softer than traditional biscotti, these are baked for a shorter time.

Ingredients:
  • 6 tablespoons unsalted butter, softened, plus more for baking sheet
  • 2 cups all-purpose flour, plus more for baking sheet
  • 1/2 cup unsweetened cocoa powder
  • 1 teaspoon baking soda
  • 1/4 teaspoon salt
  • 1 cup sugar
  • 2 large eggs
  • 1 cup shelled pistachio nuts
  • 1/2 cup chocolate chips (I used dark chocolate)
  • Pistachio ice cream (optional)

Directions:


  1. Heat oven to 350 degrees. Butter and flour a baking sheet; set aside.
  2. In a medium bowl, whisk together flour, cocoa powder, baking soda, and salt. In the bowl of an electric mixer, cream butter and sugar until light and fluffy. Add eggs; beat until well combined, scraping down sides of bowl if necessary. Add flour mixture, and stir to form a stiff dough. Stir in pistachios and chocolate chips. 
  3. Transfer dough to prepared baking sheet; form into a slightly flattened log, about 12 by 4 inches. Bake until slightly firm, about 25 minutes. Cool about 5 minutes. Reduce oven to 300 degrees.
  4. On a cutting board, using a sharp serrated knife, cut biscotti diagonally into 1-inch-thick slices. Arrange biscotti, cut sides down, on baking sheet, and bake until crisp but still slightly soft in the center, about 8 minutes. Optional: Serve with pistachio ice cream. 

Tuesday, February 21, 2012

Celebrate Pancake Tuesday

Today is traditionally known as Shrove Tuesday or Fat Tuesday.  It is the day preceding Ash Wednesday which marks the beginning of Lent.  (Read more about it here.)  In some countries it is also called Pancake Tuesday because of the tradition of eating pancakes for dinner.  So how about serving your family a yummy meal of homemade pancakes for dinner tonight?  Who doesn't love breakfast for dinner?


[Recipes reprinted from this original post.]
Sift together:
1 cup flour
1/2 tsp baking powder
1/2 tsp baking soda
1/2 tsp salt
1 Tbsp sugar
Combine with:
1 Tbsp oil
1 cup buttermilk
2 egg yolks
Beat until frothy:
2 egg whites
Fold egg whites into batter.
Cook on a hot, buttered skillet.
Enjoy with your favorite breakfast meat and some fresh fruit!

Here's another family recipe that works great for dinner as well!

German Pancakes (really this is more like an egg cake than a cakey-cake)

Laura's German Pancake!
Click Here to Print German Pancakes

Turn the oven to 425 degrees.
Melt 6 Tbsp of butter in a 13"x9" pan, in the warming oven. 
Mix the following ingredients together. 
It will be slightly lumpy. 
Remove baking pan from the oven (butter should be melted by now.)
Pour the mixture into the pan and bake at 425 degrees for 15-20 minutes.
Serve immediately with maple syrup or your favorite pancake topping.

1 cup flour
1 cup milk
6 eggs
1 tsp salt

Thursday, February 16, 2012

Oat Cottage Cheese Biscuits

I had some cottage cheese in the fridge last week that was supposed to go into another recipe but I changed my mind and made these instead.  They turned out to be really good, nice chewy texture and good flavor, and they freeze really well!  I have been pulling them out of the freezer one-at-a-time for lunch (with a big salad) or to go with my bowl soup or chili.  (You can warm them in the oven if you have it on anyway, or microwave one for 10 seconds or so.)  Give them a try!


[From Jane Brody's Good Food Book.  I recognize there is a lot of talk these days about grains and what is or is not healthy for you, low-carb diets and all... not sure what I make of all of it, but I still like and use this book!  Most things in moderation...]  This recipe makes 18 biscuits.

You'll need:
  • 2 c unbleached white flour
  • 1 c oat flour (if you don't have oat flour, which I didn't, you can put old-fashioned oats into your blender and grind them up -- works just fine)
  • 2 t sugar 
  • 1 t salt
  • 4 t baking powder
  • 1/2 t baking soda
  • 1/2 t cream of tartar (I didn't have any and the recipe was fine)
  • 1/4 c butter
  • 2 eggs, beaten well
  • 1 1/2 c cottage cheese (almost the whole tub)
Combine the flours, sugar, salt, baking powder, baking soda, and cream of tartar (if you have it) in a bowl.  Work in the butter with a pastry blender or fork.  Combine the beaten eggs and cottage cheese in a separate bowl and then add to the flour mixture, using your hands to mix together well.

Turn the dough out onto a lightly floured board and knead for a minute or two until it comes together and is smooth.  Divide the dough into 3 equal parts.  Working with one part at a time, press or roll out into a rectangle about 1/2 inch thick.  Cut each rectangle into 6 equal pieces.  Repeat with the other two parts.

Place the biscuits onto a baking sheet or stone and bake for 10-12 minutes in a 425 degree oven.


Again, these freeze really well so enjoy one while it's warm and put the rest away for a rainy day!