Thanks to this site I have found several more healthy meal-replacement smoothies to try!
Unfortunately my blender jar was in the dishwasher this morning. And of course it hasn't been run yet... so lazy me decided to try making my smoothie in the food processor instead. Which of course makes absolutely no sense since now not only do I have a dirty blender but also a dirty food processor. Yes, I am THAT smart.
But I got my smoothie in my belly faster and that's all that matters really.
Here's the recipe:
1 cup plain yogurt
1 tsp maple syrup
1 cup diced strawberries
1 banana
A small handful almonds
1/2 cup old fashioned oats
Blend! {or Process!}
When you are done, toss it in a large glass and grab a straw. It's a bit gritty because of the nuts, but it goes down just fine when you drink it through a straw. It has an earthy taste but is sweetened by the fruit and syrup. Even the baby girl gave it a few sips!
Showing posts with label She Cooks. Show all posts
Monday, April 8, 2013
Wednesday, April 3, 2013
Make Grilled Cheese Roll-ups
Here's a very fun idea for lunch for your kids (and you 'cause they're pretty good!)...
Take a few slices of bread and roll them out really thin. I left the crusts on because my bread was really soft. If you are using a hearty bread you may need to trim the slices down. Once they are really thin, place some pieces of cheese on top and roll from one side to the other. Squeeze them down and place them in melted butter on your skillet. Cook until brown and then flip them over with tongs. Brown the second side and serve them up! P.S. I think these are best with cheddar.
Thanks, Recipe By Photo!
Take a few slices of bread and roll them out really thin. I left the crusts on because my bread was really soft. If you are using a hearty bread you may need to trim the slices down. Once they are really thin, place some pieces of cheese on top and roll from one side to the other. Squeeze them down and place them in melted butter on your skillet. Cook until brown and then flip them over with tongs. Brown the second side and serve them up! P.S. I think these are best with cheddar.
Thanks, Recipe By Photo!
Friday, March 29, 2013
Make Homemade Vinaigrette
Salad + me. Something like this:
Childhood -- iceberg lettuce, chopped carrots, quartered tomatoes (maybe even chopped celery?), drizzled with Kraft's Catalina dressing.
College -- more iceberg lettuce (with perhaps a bit of romaine?), broccoli florets, chopped hard-boiled egg, sunflower seeds, chinese noodles (you know, those deep fried things), and grated carrot, bathed in Ranch dressing.
Adulthood -- Caesar salad.
Parenthood -- more Caesar salad. Really ready for something different...
So I've recently figured out how easy it is to whisk up a freshly made-to-order vinaigrette dressing and then toss it with some spring mix or whatever greens I have on hand. I'm probably the last person on this green earth to figure this out, but I do tend to run about 10 years behind, so it's to be expected.
Anyways, here's how simple it is:
(Recipe found in Melissa d'Arabian's Ten Dollar Dinners and online here as Cafe Green Salad).
Serves 4 for small side-salad or 2 if you are serving just this plus a meat or fish.
I've found the best thing is that you can actually just let this sit until you are ready to serve the salad -- put handfuls of greens on top of the dressing when you're ready and toss away. The bowl you see in this photo could be pretty much filled with salad and then tossed. As I said, this will serve about 4 for side salads or 2 people who are hungry and are eating just this and a fish or meat portion.
You can serve the salad just as is, simple and fresh, or you can add any of the following optional ingredients, whatever you like!
Optional but extra yummy additions -- sliced or chopped avocado, halved cherry or grape tomatoes, toasted pine nuts.
Childhood -- iceberg lettuce, chopped carrots, quartered tomatoes (maybe even chopped celery?), drizzled with Kraft's Catalina dressing.
College -- more iceberg lettuce (with perhaps a bit of romaine?), broccoli florets, chopped hard-boiled egg, sunflower seeds, chinese noodles (you know, those deep fried things), and grated carrot, bathed in Ranch dressing.
Adulthood -- Caesar salad.
Parenthood -- more Caesar salad. Really ready for something different...
So I've recently figured out how easy it is to whisk up a freshly made-to-order vinaigrette dressing and then toss it with some spring mix or whatever greens I have on hand. I'm probably the last person on this green earth to figure this out, but I do tend to run about 10 years behind, so it's to be expected.
Anyways, here's how simple it is:
(Recipe found in Melissa d'Arabian's Ten Dollar Dinners and online here as Cafe Green Salad).
Serves 4 for small side-salad or 2 if you are serving just this plus a meat or fish.
You'll need:
- peeled clove of garlic, sliced in half
- 1 tsp Dijon mustard
- 1 T red wine or balsamic vinegar (if you double the recipe and have both, use 1T of each)
- 1/4 tsp soy sauce
- pinch kosher or sea salt
- 1/4 tsp ground black pepper
- 3 T olive oil
I've found the best thing is that you can actually just let this sit until you are ready to serve the salad -- put handfuls of greens on top of the dressing when you're ready and toss away. The bowl you see in this photo could be pretty much filled with salad and then tossed. As I said, this will serve about 4 for side salads or 2 people who are hungry and are eating just this and a fish or meat portion.
You can serve the salad just as is, simple and fresh, or you can add any of the following optional ingredients, whatever you like!
Optional but extra yummy additions -- sliced or chopped avocado, halved cherry or grape tomatoes, toasted pine nuts.
Thursday, March 28, 2013
Make Beef & Bean Burritos for the Freezer
Beef & Bean Burritos -- for the Freezer
makes 16-24 burritos per batchI have only made the 8" variety and find them the perfect size for lunch -- just add a piece of fruit and you're all set. A hearty appetite may require two of burritos for dinner; these are especially convenient when you need to feed someone who is running off to skating practice or choir rehearsal... or when you're dining alone!
Ingredients
2 lbs ground beef2 cans (16 oz each) plain refried beans (or similar quantity of homemade refried beans)
3 c shredded cheese ("Mexican" packaged or combo of monterey jack and cheddar -- whatever you like!)
1 1/3 c enchilada sauce (1 jar or can or similar quantity of homemade enchilada sauce)
1/2 c water
1/3 c chopped onion (one small onion)
2 T chili powder
1 T garlic powder
2 t dried oregano
1 t salt
16 (10") flour tortillas or 24 (8") flour tortilla
Optional toppings, later for serving (although I like them just plain, myself!): more shredded cheese, sour cream, shredded lettuce, chopped tomatoes, chopped avocado, etc.
For assembly you will need plain white paper towels (tear or cut full sheets in half) and aluminum foil as well as zip freezer bags.
Directions
In a large heavy-bottom pan or Dutch oven, brown the beef over medium heat until cooked, drain off fat and leave the meat in the pan. Add the refried beans, cheese, enchilada sauce, water, onion, chili powder, garlic powder, oregano, and salt. Stir until thoroughly blended and bring the mixture to a gentle boil. Reduce heat to low, cover, and simmer for 10-15 minutes or until the onion is soft.(At this point you will definitely want to get a spoon out and dig in. Try and resist or at least act in moderation.)
Let the mixture cool slightly. Set up for assembly as follows:
- keep a skillet on medium heat to warm each tortilla as you need it (for 5-10 seconds)
- place a piece of aluminum foil (about 8" wide) horizontally on your work surface
- place a half-paper towel on top of the foil
- place the warmed tortilla on the paper towel
- spoon 1/2 c (if using 10" tortillas) or 1/3 c (if using 8" tortillas) of the filling in the middle of the tortilla
- fold the sides of the tortilla towards the middle and then fold the bottom up and top down
- flip the wrapped burrito over (seam side down) onto the paper towel and wrap the same way in the paper towel (sides in, bottom up, top down)
- flip the burrito again and wrap the same way in the foil!
- place this little burrito package in a zip freezer bag (you should be able to fit about 8 in a gallon size bag) or other freezer container
- burritos may be frozen for up to 2 months!
Serve with optional toppings of your choice or all by itself!
Recipe source: Taste of Home -- slightly modified with additional assembly directions and larger serving size.
Monday, March 25, 2013
Honey Baked Chicken
My More-with-Less Cookbook is on my kitchen shelf and is well loved. ( If you don't own a copy, I encourage you to go ahead and remedy that situation!) This chicken recipe is tasty, easy, and can be successfully used with whatever kind of chicken you have on hand!
I think this recipe works great with chicken thighs but the original recipe calls for a cut-up 3 lb chicken so go ahead and do it that way if you want. You could also try chicken breasts (if you have a good source) but obviously, if they are boneless and skinless you will have to shorten the cooking time. Start checking for done-ness after the 30 minute mark, I would say.
You'll need:
6-8 chicken thighs (see above note)
1/3 c. butter
1/3 c. honey
2 T prepared mustard
1 t salt
1 t curry powder
Arrange the chicken in a shallow baking dish, skin-side up. Melt the butter in a microwave-safe glass bowl. Add the honey, mustard, salt, and curry powder to the bowl and whisk together until completely combined. Pour the mixture evenly over the chicken pieces and bake in a 350 degree oven for 1 1/4 hours, basting every 15 minutes, until the chicken is tender and has a lovely golden brown glaze.
Source: More-with-Less Cookbook
I think this recipe works great with chicken thighs but the original recipe calls for a cut-up 3 lb chicken so go ahead and do it that way if you want. You could also try chicken breasts (if you have a good source) but obviously, if they are boneless and skinless you will have to shorten the cooking time. Start checking for done-ness after the 30 minute mark, I would say.
Honey Baked Chicken
Serves 6-8You'll need:
6-8 chicken thighs (see above note)
1/3 c. butter
1/3 c. honey
2 T prepared mustard
1 t salt
1 t curry powder
Arrange the chicken in a shallow baking dish, skin-side up. Melt the butter in a microwave-safe glass bowl. Add the honey, mustard, salt, and curry powder to the bowl and whisk together until completely combined. Pour the mixture evenly over the chicken pieces and bake in a 350 degree oven for 1 1/4 hours, basting every 15 minutes, until the chicken is tender and has a lovely golden brown glaze.
Source: More-with-Less Cookbook
Thursday, March 21, 2013
Simple Pan-Fried Fish
![]() | |
| Happy First Full Day of Spring 2013! |
Y'all probably already know all about pan-frying fish but hey, just in case you need a reminder of how simple and yummy this preparation is... I'm here for you!
Tilapia can be bought individually frozen or in larger packages in your grocery freezer case or fresh at the fish counter . Either way, cook it up this way and you'll love it. I recently served this to dinner guests as part of the following menu:
Cream of Mushroom Soup (not the canned kind... fresh and flavorful and so smooth)
Pan-Fried Tilapia
Roasted White and Sweet Potatoes or Homemade Macaroni & Cheese
Spring Greens Salad with Homemade Vinaigrette
Fresh Apple Cake with Warm Vanilla Sauce
There were both children and adults at this meal and everyone was satisfied.
Pan Fried Tilapia
Serves 6.
You'll need:
6 tilapia filets
Butter (3-4 T)
Olive Oil (4-6 T)
Sea salt or kosher salt
Freshly ground black pepper
When the oil/butter is hot, place the filets in the pan, two batches of three filets probably will work. Cook the filets 2-3 minutes or until golden and crisp on the pan side. When ready, carefully flip (stand back and avoid splattering yourself!) and continue cooking on the other side for another 2-3 minutes. Make sure the fish is nice and crisp, and therefore full of flavor! (After the first batch is done you may want to add more butter and olive oil to the pan -- 1 T butter and 2 T olive oil -- and make sure it's nice and hot before adding the remaining filets.)
When the first batch is done, remove the filets to a serving platter and keep warm (uncovered) in a 200 degree oven while you fry the remaining fish. When they are done transfer to the platter and serve!
Saturday, March 16, 2013
Cookbooks -- On my Kitchen Bookshelf
I don't own a lot of cookbooks but I sure do like reading them -- I figure that's one of the purposes of public libraries and I generally check cookbooks out by the handful. I love paging through them! Occasionally -- wait for it -- I even cook something from a cookbook! But I definitely don't feel pressured to do so. Most of the time I'm just enjoying the pretty pictures, expanding my food horizons by reading about the possibilities, but I'm not really going to actually use the cookbook.
What about you? I expect you have your favorite cookbook author or TV cooking show host extraordinaire... someone whose recipes you completely trust and whose style of cooking meshes well with your tastes and preferences.
Here are a few of my favorites, cookbooks that I actually cook from. These are the ones that are on the bookshelf above my kitchen counter and that I pull ideas and recipes from regularly.
Betty Crocker's New Cookbook -- basic cooking information with many tried-and-true recipes.
Pioneer Woman Cooks: Recipes from an Accidental Country Girl and Pioneer Woman Cooks: Food from my Frontier -- sure you can get a lot of good recipes on her website but the book is great too and with few exceptions, everything I make from her is delish!
Joy of Cooking -- I don't actually cook much from this but it's a great ingredient and know-how resource
More-with-Less Cookbook -- this one has stood the test of time, originally published in 1976, it has withstood the 80's, 90's, and the "oughts", with all the food fads and no-nos, it promote real food and simple, healthful recipes.
In addition I have few new favorites or potential favorites --
Ten Dollar Dinners by Melissa D'Arabian -- ways to cook healthy and tasty food for your family, without spending a lot at the grocery store. Check this one out from the library and you might end up buying your own copy.
How to Cook Everything: The Basics by Mark Bittman. I really like this one. Again, try to review a library copy and decide if you want to own.
How to Cook like a Rock Star by Anne Burrell. I just bought this after a friend strongly recommended. Am eager to try!
By far my favorite recipe resource, however, is my hand-made notebook of recipes that I've collected over the years -- from friends, blogs, other online resources. I definitely recommend keeping something like this in your kitchen, it's as simple as buying a spiral-bound notebook and taping or stapling recipes onto each page. Write your comments around them. If you didn't like a recipe after making it, just tape another one over it! Every recipe in this journal is one that I make over and over again and I find it a much better way to keep track of all those printed-out-recipes than stuffing them in a drawer or into another cookbook... or any of the other places we stuff those kinds of pieces of paper...
I also use this recipe journal as a place to record menus for holiday or special meals and for what I served when we've had friends over for dinner. This helps me in creating new menus and I like to have a record of what I've served.
Lastly, I have a recipe collection binder that I bought years ago from a Pampered Chef consultant. This is where I keep recipes that come to me from family members and friends, most of these recipes are pre-internet and were hand-written on a recipe card.
What's your favorite cookbook?
What about you? I expect you have your favorite cookbook author or TV cooking show host extraordinaire... someone whose recipes you completely trust and whose style of cooking meshes well with your tastes and preferences.
Here are a few of my favorites, cookbooks that I actually cook from. These are the ones that are on the bookshelf above my kitchen counter and that I pull ideas and recipes from regularly.
Betty Crocker's New Cookbook -- basic cooking information with many tried-and-true recipes.
Pioneer Woman Cooks: Recipes from an Accidental Country Girl and Pioneer Woman Cooks: Food from my Frontier -- sure you can get a lot of good recipes on her website but the book is great too and with few exceptions, everything I make from her is delish!
Joy of Cooking -- I don't actually cook much from this but it's a great ingredient and know-how resource
More-with-Less Cookbook -- this one has stood the test of time, originally published in 1976, it has withstood the 80's, 90's, and the "oughts", with all the food fads and no-nos, it promote real food and simple, healthful recipes.
In addition I have few new favorites or potential favorites --
Ten Dollar Dinners by Melissa D'Arabian -- ways to cook healthy and tasty food for your family, without spending a lot at the grocery store. Check this one out from the library and you might end up buying your own copy.
How to Cook Everything: The Basics by Mark Bittman. I really like this one. Again, try to review a library copy and decide if you want to own.
How to Cook like a Rock Star by Anne Burrell. I just bought this after a friend strongly recommended. Am eager to try!
By far my favorite recipe resource, however, is my hand-made notebook of recipes that I've collected over the years -- from friends, blogs, other online resources. I definitely recommend keeping something like this in your kitchen, it's as simple as buying a spiral-bound notebook and taping or stapling recipes onto each page. Write your comments around them. If you didn't like a recipe after making it, just tape another one over it! Every recipe in this journal is one that I make over and over again and I find it a much better way to keep track of all those printed-out-recipes than stuffing them in a drawer or into another cookbook... or any of the other places we stuff those kinds of pieces of paper...
I also use this recipe journal as a place to record menus for holiday or special meals and for what I served when we've had friends over for dinner. This helps me in creating new menus and I like to have a record of what I've served.
Lastly, I have a recipe collection binder that I bought years ago from a Pampered Chef consultant. This is where I keep recipes that come to me from family members and friends, most of these recipes are pre-internet and were hand-written on a recipe card.
What's your favorite cookbook?
Friday, March 15, 2013
Make Macaroni & Cheese -- Stove Top Style
We have been entertaining quite a bit since moving to our new home in Indiana. And by that I don't mean that we're a laugh riot now and we make those around us un-bored -- what I mean is that we are "being hospitable" (as my husband says). Having people over for dinner. Making new friends. It's fun and I'm enjoying having the kind of home and kitchen that makes doing this a pretty easy thing.
When there are young children accompanying their parents to our house for dinner, I like to have a dish of mac & cheese available to suit their sometimes simpler palate... and the baked kind, though it can be delicious, doesn't hold up to sitting around very well. Plus it takes up space in my oven. In search for a recipe that could be made ahead and then sit on the back of the stove while I prepared the other dishes, and still be creamy and yummy it when it was time to eat, I found this popular version -- Stove Top Mac-n-Cheese, courtesy Alton Brown and the Food Network. It's a good one, but I've tweaked and toned it down just a bit to make it even simpler to make and less intensely flavored -- we're not big mustard fans around here so I took that out entirely.
Once you get the hang of this recipe (and make a habit of keeping these simple ingredients on hand) you'll find it's really not that much more work than the blue box, for a much tastier and healthier result.
In a separate bowl or large glass measuring cup, whisk together the evaporated milk, eggs, salt, and black pepper. (You can do this step while the pasta is cooking and have it ready to go when the pasta has been drained & buttered. You can also shred the block of cheese while the pasta is cooking, if you haven't bought the pre-shredded kind.) Stir the egg & milk mixture into the pasta.
Now add the shredded cheese to the pot and turn the heat to low -- stir the (somewhat strange looking at this point) mixture steadily with a wooden spoon and after 3 to 4 minutes it will magically morph into a creamy, sauce-y, yummy pot of mac & cheese! Make sure it's nice and hot, and enjoy immediately, or cover and set on the back of the stove (no heat) until you are ready to serve -- you may need to add a splash of regular milk and stir it a bit over very low heat before serving but I have had this sitting for up to an hour and it's been just fine!
When there are young children accompanying their parents to our house for dinner, I like to have a dish of mac & cheese available to suit their sometimes simpler palate... and the baked kind, though it can be delicious, doesn't hold up to sitting around very well. Plus it takes up space in my oven. In search for a recipe that could be made ahead and then sit on the back of the stove while I prepared the other dishes, and still be creamy and yummy it when it was time to eat, I found this popular version -- Stove Top Mac-n-Cheese, courtesy Alton Brown and the Food Network. It's a good one, but I've tweaked and toned it down just a bit to make it even simpler to make and less intensely flavored -- we're not big mustard fans around here so I took that out entirely.
Once you get the hang of this recipe (and make a habit of keeping these simple ingredients on hand) you'll find it's really not that much more work than the blue box, for a much tastier and healthier result.
Macaroni & Cheese -- Stove Top Style
Serves 4-6 as a hearty side dish.Ingredients:
- 1/2 pound elbow macaroni (approx. 2 cups)
- 4 T butter
- 6 oz evaporated milk (this is half of a large can or use a small can which is 5 oz -- should be fine)
- 2 eggs
- 1 tsp kosher salt
- black pepper, to taste
- 8 oz medium cheddar cheese, shredded (most grocery-store blocks are 8 oz, or use a pre-shredded bag which should also come in 8 oz size)
Directions:
Bring a large pot of salted water to boil and cook the elbow macaroni until al dente. Drain. Return the pasta to the pot. Add the butter and toss to coat.
In a separate bowl or large glass measuring cup, whisk together the evaporated milk, eggs, salt, and black pepper. (You can do this step while the pasta is cooking and have it ready to go when the pasta has been drained & buttered. You can also shred the block of cheese while the pasta is cooking, if you haven't bought the pre-shredded kind.) Stir the egg & milk mixture into the pasta.
Now add the shredded cheese to the pot and turn the heat to low -- stir the (somewhat strange looking at this point) mixture steadily with a wooden spoon and after 3 to 4 minutes it will magically morph into a creamy, sauce-y, yummy pot of mac & cheese! Make sure it's nice and hot, and enjoy immediately, or cover and set on the back of the stove (no heat) until you are ready to serve -- you may need to add a splash of regular milk and stir it a bit over very low heat before serving but I have had this sitting for up to an hour and it's been just fine!
Thursday, March 14, 2013
Enjoy Irish Foods on St. Patrick's Day!
Enjoy some authentic Irish food while you and your family "Go Irish" on St. Patrick's Day! (In case you're not remembering, it's this Sunday, March 17.)
A completely traditional "Full Irish Breakfast" could be a bit difficult to pull off, but you can approximate it by serving any or all of the following to your family:
- fried egg (usually sunny-side-up)
- bacon (you probably won't be able to find the British-style "rasher" -- here is a great article explaining just what exactly this is! -- so just sub in regular ole' American bacon, what the Brits call "streaky bacon")
- sausages
- buttered toast (white or wheat, but it should be sandwich bread style, nothing fancy or artisan!)
- baked beans (NOT the maple-flavored Boston-style, but this plain tomato based version)
- small tomato, cut in half and broiled or pan-fried
- sauteed whole mushrooms
- soda bread
- potato scone (a triangular shaped flour-y hash brown; most traditional in a Scottish full breakfast)
- black pudding
- white pudding
I've personally never been able to bring myself to include black pudding (and I don't think I ever got the opportunity to enjoy white pudding) when I've been breakfasting somewhere in the British Isles... I won't hold it against you if you skip it. And of course you'll want cold orange juice and plenty of hot, milky, sweet, black tea to go along with this filling full breakfast!
Options for later in the day include:
- Irish Stew (mutton or lamb, potatoes, onions, carrots, leeks, cabbage leaves)
- Beef and Guinness Pie (pretty much what it sounds like)
- Corned Beef and Cabbage (again, pretty much what it sounds like... I made this just one time for my family... not really a favorite)
- Colcannon (this is a favorite!)
Wednesday, March 13, 2013
Make Mexican Chicken & Rice
Okay peeps, here is my FAVORITE easy dish for those crazy busy days...Mexican Chicken with Rice
This recipe was originally a crock pot idea, but I am going to share how I prepare it for my family.
In the morning I take 1 pound of boneless chicken breasts out of the freezer (do you keep a stockpile of chicken in your freezer? If not, you should! More on that another day...)
I also put just under 2 cups of rice with 2 cups of water in my rice cooker. (This is the amount that works for our family of 5, plus the occasional babysitter who is eating with the kids while I am teaching in the music studio.) My rice cooker has a delay timer, so I can set it and forget it!
After the chicken has thawed enough for me to cut it into cubes, I throw the pieces into a skillet and sprinkle them with cumin and seasoning salt to taste. I cook the chicken until it has just turned from pink to white and then I toss it all into a bowl with 1/2 cup of enchilada sauce. If you want to have less dishes to wash, just pour the enchilada sauce in an 8x8 baking dish and then stir in the chicken. Sprinkle the chicken with 4 ounces of shredded cheese and bake at 350 degrees for 10-20 minutes. Scatter with 3 chopped green onions and serve over the rice that has been cooking in the rice cooker!
If you're like me and enjoy making things from scratch, then you have to make this homemade enchilada sauce. It's so good!!! And you can freeze it!
Saturday, December 8, 2012
Jalapeno Cheese Muffins
The intro to this post has nothing to do with Jalapeno Cheese Muffins. Well, indirectly it does. Stay with me.
My husband has always been fascinated by the frozen bag of seafood. You've probably all seen it. It has crab and shrimp and squid, clams and bits and pieces of who knows what all else. He typically wanders around the grocery store and manages to get himself lost. I usually find him in the frozen food aisle, holding the frozen bag of who-knows-what-alls from the sea. Staring at it and smiling. "What do you suppose is REALLY in here? Could you make something with it? That'd be fun, don't you think?" I usually scowl and poke him and say, ew, put that back, no, I don't know what's in there.
Well, three weeks ago, I caved. I threw the bag in the cart and subsequently stared at it almost every time I opened up the freezer for my predictable chicken. Then a few nights ago I thought....okay. What am I going to do with this? Seafood bisque! It can't be much harder than clam chowder. I grabbed the cream and tomato sauce and started chopping up all the what's-its, trying not to actually identify what anything was, beyond the shrimp. I'm pretty sure there were some tentacles, but I plowed on through and got it all chopped and in the pot. And you know what? The bisque was divine. (Recipe for Seafood Bisque to come in a future "She Who Makes" post!)
Now, I thought, what to serve with the bisque? Then it came to me. JALAPENO CHEESE MUFFINS. And you know what else? It was the perfect combination. Two words: Yum. Mers.
I found this recipe on www.food.com. I modified it slightly, though. It wouldn't be a "Laura" recipe, if it wasn't modified. =)
Jalapeno Cheese Muffins
Mix together in a large bowl:
My husband has always been fascinated by the frozen bag of seafood. You've probably all seen it. It has crab and shrimp and squid, clams and bits and pieces of who knows what all else. He typically wanders around the grocery store and manages to get himself lost. I usually find him in the frozen food aisle, holding the frozen bag of who-knows-what-alls from the sea. Staring at it and smiling. "What do you suppose is REALLY in here? Could you make something with it? That'd be fun, don't you think?" I usually scowl and poke him and say, ew, put that back, no, I don't know what's in there.
Well, three weeks ago, I caved. I threw the bag in the cart and subsequently stared at it almost every time I opened up the freezer for my predictable chicken. Then a few nights ago I thought....okay. What am I going to do with this? Seafood bisque! It can't be much harder than clam chowder. I grabbed the cream and tomato sauce and started chopping up all the what's-its, trying not to actually identify what anything was, beyond the shrimp. I'm pretty sure there were some tentacles, but I plowed on through and got it all chopped and in the pot. And you know what? The bisque was divine. (Recipe for Seafood Bisque to come in a future "She Who Makes" post!)
Now, I thought, what to serve with the bisque? Then it came to me. JALAPENO CHEESE MUFFINS. And you know what else? It was the perfect combination. Two words: Yum. Mers.
I found this recipe on www.food.com. I modified it slightly, though. It wouldn't be a "Laura" recipe, if it wasn't modified. =)
Jalapeno Cheese Muffins
Mix together in a large bowl:
2 cups flour
1 tablespoon baking powder
1/2 teaspoon baking soda
1 tablespoon white sugar
1/2 teaspoon salt
1 tablespoon baking powder
1/2 teaspoon baking soda
1 tablespoon white sugar
1/2 teaspoon salt
2 cups grated cheddar cheese
1 tablespoon very finely minced onion
Whisk together in a separate, smaller bowl:
1 cup Plain Greek yogurt
1/4 cup melted butter
2 eggs
2 eggs
3 tablespoons finely chopped jalapeno peppers
Add wet ingredients to dry ingredients and stir until evenly moistened. The muffin batter will be very dry. It will have a sort of soft, pizza dough consistency. With a non-stick spray of your choice, grease a muffin pan. Or use muffin cups, but grease the inside of the muffin cups. I think a baking stone muffin pan works best. Generously fill with the muffin batter. Bake at 400 F for 15 minutes. Makes 12 muffins.
Tuesday, November 20, 2012
Sharing Our Thanksgiving Menus
Reposting from November 2011...
Emily's menu:
We'll be hosting 7 international students in our little home here in Northern Indiana. All three children (20 year-old son, 18 year-old daughter, and of course our 13 year-old daughter) will be here too, yay! So that's 12 of us total. Should be fun!
Not much to add here... we are going pretty traditional. We will be sharing our Thanksgiving meal (two families makes 10 people!) together this year in Natalie's cozy little house. We plan to round out our early afternoon of eating with a rousing game of RISK (for the boys) and snuggling the preschooler and baby (for the girls) or a LOUD game of Catch Phrase... finishing off with turkey sandwiches later in the evening if we are hungry again! (family tradition) As always in our house, there will be an everflowing pot of Hot Apple Cider available...
Laura's Stuffing, or The Yummiest Stuffing Ever
Click here for Printable
Hot Apple Cider
Click here for Printable
What to do with your Turkey when you are done with it.
Make stock. Put the turkey carcass and any other leftover bits in a large pot and cover with water. Roughly cut some onions, carrots, celery (with skins and ends) and add to the pot along with some dried sage, rosemary and thyme and bring to boil. Let it simmer for a good long while -- maybe 30 minutes to an hour; until the veggies are soft. Pour the stock through a strainer and discard the solids. Store stock in the fridge for use in the next few days or put it in freezer containers for later.
Here is what we served last year for our Thanksgiving meals.
What are you serving to your friends and family?
Emily's menu:
We'll be hosting 7 international students in our little home here in Northern Indiana. All three children (20 year-old son, 18 year-old daughter, and of course our 13 year-old daughter) will be here too, yay! So that's 12 of us total. Should be fun!
- Roast
w/ Homemade Gravy (HINT: use Reynolds Oven Bags for better-tasting turkey and shorter cooking time)Turkey - Smithfield "Spiral" Ham
- Traditional Bread Stuffing (I might have to try Laura's version, below)
- Mashed Potatoes (HINT: make in the morning and keep warm in a crockpot)
- Mashed Sweet Potatoes (recipe below)
- Green Bean Casserole (Yup. Beans + cream-of-mushroom-soup + french fried onions.)
- Heavenly Carrots (recipe below)
- Sr. Schubert’s Parker House Rolls (as good as homemade and um, much easier!)
- Cranberry sauce (from a can...)
- Pumpkin pie with Whipped Cream (I always use the recipe on the Libby's can of pumpkin)
- Pecan pie with Whipped Cream (Pioneer Woman's recipe is really really good.)
- Apple pie with Vanilla Ice Crea
- Coffee, Tea, Apple Cider, Sparkling Water
(Oh, at this point in my life I use boughten pie crusts. I'll get back to crusts-from-scratch some day, but not now. Just keepin' it real.)
- 4 c thinly sliced and cooked carrots (I usually steam them for about 8 minutes)
- 1 ½ c plain or herb croutons
- 1 c shredded cheddar cheese
- 2 eggs, beaten
- ¼ c half & half
- ¼ c butter, melted & slightly cooled
- 1 ½ tsp Worcestershire sauce
- 1 tsp salt
While the carrots are steaming/cooking, mix all the remaining ingredients together well in a large bowl. Add the cooked carrots and stir together well. Pour into a casserole dish and bake in a 350 oven for 30 minutes or so, until the mixture is set (you want to make sure the egg is cooked through) and the top is bubbly & lightly browned. Yum!!
Mashed Sweet Potatoes
Click here for Printable
Put the rest of the ingredients (except for black pepper) into a small saucepan and heat just to boiling. Remove from heat and add the mixture to the mashed sweet potatoes. Stir together well. Add freshly ground black pepper, to taste. Serve immediately.
This is a nice alternative to the super-sweet sweet potato casseroles that often get served at holiday meals.
Natalie & Laura's menu:Mashed Sweet Potatoes
Click here for Printable
- 2 lbs sweet potatoes
- 2 T maple syrup
- 2 T unsalted butter (I never have this so I use regular and cut back on the salt)
- ½ tsp orange zest
- ½ tsp balsamic vinegar
- 3/4 tsp kosher salt
- freshly ground black pepper, to taste
Roast sweet potatoes until soft (about 30 minutes in 350 oven or however long it takes for them to get nice and soft). Let sweet potatoes cool slightly, remove skins and mash the sweet potatoes in a bowl.
Put the rest of the ingredients (except for black pepper) into a small saucepan and heat just to boiling. Remove from heat and add the mixture to the mashed sweet potatoes. Stir together well. Add freshly ground black pepper, to taste. Serve immediately.
This is a nice alternative to the super-sweet sweet potato casseroles that often get served at holiday meals.
Not much to add here... we are going pretty traditional. We will be sharing our Thanksgiving meal (two families makes 10 people!) together this year in Natalie's cozy little house. We plan to round out our early afternoon of eating with a rousing game of RISK (for the boys) and snuggling the preschooler and baby (for the girls) or a LOUD game of Catch Phrase... finishing off with turkey sandwiches later in the evening if we are hungry again! (family tradition) As always in our house, there will be an everflowing pot of Hot Apple Cider available...
- Roast Turkey with Homemade Gravy (Laura makes THE BEST gravy!)
- Laura's Stuffing (recipe below)
- Mashed Red Potatoes
- Sweet Potatoes with Crispy Bacon (trying this recipe for the first time)
- Broccoli with Almonds
- Heavenly Carrots (recipe above)
- Homemade "3-Bumped Rolls" (what our family calls Cloverleaf-style dinner rolls)
- Homemade Applesauce (sprinkled with cinnamon)
- Hot Apple Cider (recipe below)
- Various Celebratory Beverages both for adults and young people
- Apple Crisp with Vanilla Ice Cream
- Pumpkin Pie with Whipped Cream
- Berry Pie with Whipped Cream
Laura's Stuffing, or The Yummiest Stuffing Ever
Click here for Printable
- 1/2 bulk pork sausage, Italian or sage, whichever you like
- 1 onion, chopped
- a few stalks celery, chopped (I like to add in the leafy ends, too)
- 8-10 mushrooms, chopped, if your family likes them
- dried herbs -- sage, rosemary and thyme, to taste
- salt & pepper, to taste
- 4 cups, give or take, of sourdough bread, cut into chunky cubes, about 1"
- 2 cups of chicken stock (for best results, use homemade stock; see below)
- about 1 cup roasted chestnuts, chopped (or another kind of nuts)
Hot Apple Cider
Click here for Printable
- 1 apple
- 2 tsp whole cloves
- 1 orange, thinly sliced
- 1 gallon apple cider (choose a local or seasonal brand, not the in-store stuff that is available all year)
- 1/2 cup brown sugar
- 1 tsp allspice
- 1 tsp nutmeg
- 3-4 cinnamon sticks
What to do with your Turkey when you are done with it.
Make stock. Put the turkey carcass and any other leftover bits in a large pot and cover with water. Roughly cut some onions, carrots, celery (with skins and ends) and add to the pot along with some dried sage, rosemary and thyme and bring to boil. Let it simmer for a good long while -- maybe 30 minutes to an hour; until the veggies are soft. Pour the stock through a strainer and discard the solids. Store stock in the fridge for use in the next few days or put it in freezer containers for later.
Friday, November 9, 2012
New and Improved Banana Smoothies!
Yesterday I posted on my Facebook page that I made a fabulously yummy smoothie. A request came in for me to blog about it... well, I sorta did last October when I wrote She Eats Breakfast: Banana Peanut Butter Smoothie, but yesterday I changed it up a little bit.
My original post included this recipe--
1/2 cup milk
1/2 cup vanilla yogurt
3 ice cubes
1 sliced banana
1 Tbsp peanut butter
1 tsp honey
1/4 tsp vanilla extract
1-2 Tbsp ground flax seed (optional)
Here's my new version:
1/2 cup yogurt (either use vanilla flavored yogurt or Greek plain with a splash of vanilla extract)
4 ice cubes
1 banana (I buy the smaller sized ones...)
1 +/- Tbsp peanut butter
1 Tbsp flax seed meal
A small handful of raw almonds
Enough milk to thin it out a little bit and help it blend better (I add this after I already have my blender going)
Much improved! And if you are blessed like I am to have a self-cleaning blender, then you can make one of these every day!!! I am sure that my sister could also comment on how to improve this smoothie by adding some whey protein or something like that, Laura?! :-)
P.S. Breakfast is SOOO IMPORTANT. Don't forget to feed yourself!!!
My original post included this recipe--
1/2 cup vanilla yogurt
3 ice cubes
1 sliced banana
1 Tbsp peanut butter
1 tsp honey
1/4 tsp vanilla extract
1-2 Tbsp ground flax seed (optional)
Here's my new version:
1/2 cup yogurt (either use vanilla flavored yogurt or Greek plain with a splash of vanilla extract)
4 ice cubes
1 banana (I buy the smaller sized ones...)
1 +/- Tbsp peanut butter
1 Tbsp flax seed meal
A small handful of raw almonds
Enough milk to thin it out a little bit and help it blend better (I add this after I already have my blender going)
Much improved! And if you are blessed like I am to have a self-cleaning blender, then you can make one of these every day!!! I am sure that my sister could also comment on how to improve this smoothie by adding some whey protein or something like that, Laura?! :-)
P.S. Breakfast is SOOO IMPORTANT. Don't forget to feed yourself!!!
Monday, November 5, 2012
Bake a "Penny Casserole"
Cheap Food with a Million Dollar Taste!!!
I got this recipe from a friend of mine a hundred years ago. It's so simple to make and totally cheap ingredients....but yet just a total yummy comfort food. Enjoy.
Prep: 25 min. Bake: 25 min.
Yield: 6-8 Servings
- 1-1/4 pounds red potatoes, cubed
- 1 lb. polish sausage or kielbasa or hot dogs
- 2 tablespoons diced onion
- 1 cup frozen peas, thawed
- 1 can (10-3/4 ounces) condensed cream of mushroom soup, undiluted or use this great substitute from a previous She Who Makes post: Cream of whatever soup
- 3 tablespoons butter, melted
- 1 tablespoon prepared mustard
- 1/8 teaspoon pepper
- Place potatoes in a large saucepan and cover with water. Bring to a boil. Reduce heat; cover and simmer for 15-20 minutes or until tender. Drain.
- In a greased 2-1/2-qt. baking dish, combine the potatoes, hot dogs, onion and peas. Combine the soup, butter, mustard and pepper; gently stir into potato mixture.
- Bake, uncovered, at 350° for 25 minutes or until heated through.
Nutritional Facts 1 serving (1 each) equals 319 calories, 23 g fat (10 g saturated fat), 45 mg cholesterol, 933 mg sodium, 19 g carbohydrate, 2 g fiber, 9 g protein.
Monday, October 29, 2012
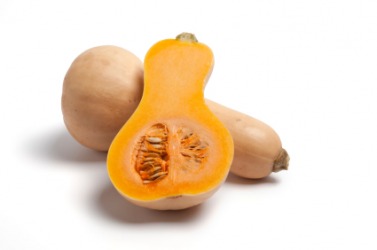
Maple-Roasted Butternut Squash
This is an easy-to-prepare and very tasty way to enjoy butternut squash!
It's an adapted version of Ina Garten's recipe ("The Barefoot Contessa") found here.
Here's what you'll need:
![]() |
| photo credit: http://images.yourdictionary.com/butternut-squash |
- 1 large butternut squash, peeled and cut into bite-size pieces
- 2-3 cloves of fresh garlic, to taste, peeled and minced (OR 1 head of garlic, separated but unpeeled)
- 2 T olive oil
- 2 1/2 T maple syrup (I've subbed maple-flavored syrup with acceptable results but it's best with real maple syrup)
- 1 t salt (kosher or sea salt if you have it)
- 1/2 t black pepper (fresh ground is best)
- 16 whole fresh sage leaves -- no substitute!
Preheat oven to 400 degrees.
Stir the garlic, olive oil, syrup, salt, and black pepper together in a small bowl. Spread the butternut squash cubes evenly on a large rimmed baking sheet (I've always used my stoneware cookie sheet and that works well -- if you have a LOT of squash you may want to use two sheets as you don't want to crowd things) and pour the oil/syrup mixture over, tossing the squash pieces to coat.
Put in the oven for about 20 minutes, stirring gently to turn over the pieces at the half-way point. After 20 minutes sprinkle the fresh sage leaves over the squash and put the pan back in the oven for another 20 minutes or so, again turning once during the baking. You want the squash pieces to begin to turn brown and be soft with crispy edges.
So yum! The original recipe included pancetta but I've never added that. It also called for leaving the garlic whole and unpeeled (remove the peel when the squash is done roasting) which you can try if you want, that probably would be yummy but usually I just mince the garlic and throw it into the mixture.
Enjoy!
Thursday, October 25, 2012
A Quick Hash for Dinner
One of the things that I like to keep on-hand in my refrigerator is Turkey Smoked Sausage. This stuff can make for a very quick meal and you don't have to worry about defrosting any meat!
My favorite recipe to use is my Smoked Sausage Hash -- I guess I will call it -- and it goes like this...
Slice the sausage into silver dollar sized pieces and sear it on a frying pan with a little bit of butter and some onions and green peppers. Once the veggies have cooked down some (to your liking --either all the way until they are soft, or leave a little bit of crunch to them) and the sausage is crisped on the edges, add some potatoes. I usually boil some diced potatoes and throw them in the pan so they will brown as well... but to make things even quicker, this time I just added some natural french fries that I had heated up in the oven.
Toss everything around and while it is cooking, scramble enough eggs to cover the whole mixture in egg. I scrambled my eggs with a bit of milk, but water works well also and doesn't add extra calories. Pour the eggs into the pan and let it cook on low until it starts bubbling. Give it a stir, but don't stir too often. Cover the pan and let it finish off. Season to taste. (I used seasoning salt that I added when I put in the french fries.) Sprinkle some cheddar cheese on top and let it melt.
Serve with condiments if you like -- my kids like ketchup on it. My husband likes hot sauce. I like it plain.
Fast and Yummy!
My favorite recipe to use is my Smoked Sausage Hash -- I guess I will call it -- and it goes like this...
Toss everything around and while it is cooking, scramble enough eggs to cover the whole mixture in egg. I scrambled my eggs with a bit of milk, but water works well also and doesn't add extra calories. Pour the eggs into the pan and let it cook on low until it starts bubbling. Give it a stir, but don't stir too often. Cover the pan and let it finish off. Season to taste. (I used seasoning salt that I added when I put in the french fries.) Sprinkle some cheddar cheese on top and let it melt.
Serve with condiments if you like -- my kids like ketchup on it. My husband likes hot sauce. I like it plain.
Fast and Yummy!
Wednesday, October 17, 2012
Cream of Whatever Soup - No Thanks.
Here is an example of what you might find: vegetable oil, modified food starch, wheat flour, salt, dried whey, margarine, beta carotene for color, MSG, soy protein concentrate, yeast, flavoring, etc.
While some of those things are okay with me, some are not! That's why I did a little bit of research and found this...
Check out the ingredients in this amazing "S.O.S. Mix" (Soup or Sauce)
You will need:
- 2 cups powdered milk
- 3/4 cup cornstarch
- 1/4 cup instant chicken bouillon
- 2 Tbsp dried onion flakes
- 2 tsp Italian seasoning
To make the soup, take 1/3 cup of your mix and whisk it with 1 1/4 cups cold water. Cook on the stovetop until thickened. Substitute this for 1 can of creamed soup in your recipes!!!
Let me know what you think. What recipes will you try this in?
Friday, October 5, 2012
*New and Improved* Best Granola Ever
Don't you just love when you've made a recipe long enough that you can make it in your sleep and you can make it even better or at least more suited to your own family's tastes each time you try it?
This is one of those recipes that I just can't get enough of -- She Eats Breakfast: Granola
I have been making it for over a year now and I have come to discover that you can pretty much add whatever you like to this and it's always yummy. Just keep sticking to the ratio that is listed of 1:1, etc. and you will be fine!
For example, I don't like coconut, so I have never added it. Instead I just used to always add an extra 1 cup of oatmeal. Now I just add 1 cup of anything I want to or whatever I have on-hand in my kitchen. Today's variation includes Slivered Almonds and Sunflower Seeds. I am excited to try it. I used to add nuts after baking, but that was silly. Go ahead and throw them in when you are mixing it all up!
I also have come to find that Cran-Strawberries are extremely good in this concoction.
Gotta love the smell of cinnamon and vanilla that fill the kitchen each time I make this stuff.
This is one of those recipes that I just can't get enough of -- She Eats Breakfast: Granola
For example, I don't like coconut, so I have never added it. Instead I just used to always add an extra 1 cup of oatmeal. Now I just add 1 cup of anything I want to or whatever I have on-hand in my kitchen. Today's variation includes Slivered Almonds and Sunflower Seeds. I am excited to try it. I used to add nuts after baking, but that was silly. Go ahead and throw them in when you are mixing it all up!
I also have come to find that Cran-Strawberries are extremely good in this concoction.
Gotta love the smell of cinnamon and vanilla that fill the kitchen each time I make this stuff.
Friday, September 28, 2012
Make Chicken Pie for Dinner
| Pictured here with my Freezer Mashed Potatoes (for another day) |
| Apparently I didn't have a SMALL saucepan... |
At this point I go away from the original recipe because I like things to be as one-pot as possible... so I also throw in some veggies. This evening we had peas in our Chicken Pie. You can pretty much add 1-1 1/2 cups of anything and you'll still be okay with the amount of sauce you created. Anyway, after you have mixed that all together add salt and pepper to taste as well as 1 tsp dried parsley flakes [or 1 Tbsp fresh minced parsley]. Mix it all up and pour it into a pie plate.
Make a biscuit dough:
1 1/2 cups flour
1/2 tsp salt
1 Tbsp baking powder
3 Tbsp butter
1/2 cup milk
Sift dry ingredients together in a bowl. Cut in the butter until the mixture looks like crumbs. Lightly stir in milk until you have a soft [rather sticky] dough. Roll or pat out in a circle, about 1/2-inch thick. Place over chicken in the pie plate. Bake at 425 degrees for 15-20 minutes. Serves 4-6.
Wednesday, September 26, 2012
Make-it-your-own Turkey Meatball Soup
This isn't so much of a recipe as a method... you can make this soup your own by adjusting the amounts or seasonings to your family's taste. (This method of soup making works great for all kinds of chicken or turkey soup.)
Reach into your produce drawer and pull out whatever savory vegetables you have... a stalk or two of celery (or just the tops, if you've chopped them up when preparing celery sticks) and a carrot or two. Grab an onion (fresh from the pantry, or the half-an-onion that you put in a ziploc bag when you only needed a half of one yesterday).
Finely chop the vegetables, you want roughly equal amounts. Put a large pot on your stove, turn the heat to medium-low and put in an equivalent amount of tablespoons of butter per cup of veggies. (I know that explanation is crystal-clear, but just in case you're confused, what I mean here is that if you have about 2 cups of veggies then put 2 T of butter in the pan, 3 cups of veggies then 3 T of butter, etc. etc.) Stir this around and let the veggies cook until they are soft and your kitchen smells awesome. Then sprinkle an equivalent number of tablespoons of flour over the veggies and stir until nicely combined. (Again, it's obvious to you I'm sure what I mean here but just in case... if you melted 39 T of butter (because you had 39 cups of vegetables) then you should add 39 T of flour, etc. etc.)
After this mixture has cooked for a minute or two while you've stirred it around, turn the heat down to low and pour in some chicken broth. (I usually don't have chicken broth actually, but if you have some homemade then great, or canned, that's fine too... I generally add the powdered or cubed stuff to water and microwave and stir it up and voila, I have broth!) Again, the same magical match-the-amounts thing applies: add the equivalent amount (in cups this time) of broth to the mixture. Add it slowly and whisk all the time that the broth is going in. It will not glob up and make lumps and be disgusting if you make sure to have the heat on low and add the liquid in a small stream and be sure to whisk all the time. Oh, and chew gum while counting backwards from 30 at the same time, that's the key to a successful soup, believe me!
Just kidding, you don't have to chew the gum. That was a joke.
OK so now go ahead and add another equivalent amount of broth. So actually that means that you are adding DOUBLE the amount of broth.
Math is so cool.
And it's late at night and I'm punchy.
So back to the soup. At this point I would like you to add some turmeric to your yummy soup. This can be to taste, if I am making a full pot of soup to serve about 6 people, then I'd add about a teaspoon. The turmeric will make your soup all beautifully golden yellow and very healthy, and it will also stain your wooden spoon if you aren't careful to immediately rinse it. (This I know by experience.)
You should also add some other lovely herbs at this point. I recommend adding equal amounts of dried parsley, dried thyme, and dried (or rubbed) sage but you can add what you particularly like.
UND NOW, add the frozen meatballs.
Since this is turkey meatball soup it'd be a shame to forget them.
Last step is adding some rice or another small pasta or grain. I suggest brown rice, but that's because I'm all healthy and superior.
Ahem.
Now let the pot of yummyness simmer for about 30-40 minutes until the rice is cooked and the meatballs are heated through.
Sadly, I don't have a photo. You'll just have to imagine it...
Meanwhile here is an image that will certainly inspire you as you prepare soup for your family.

Here's what you'll need (ingredients-wise) for a pot of soup that should make 6-8 servings.
Reach into your produce drawer and pull out whatever savory vegetables you have... a stalk or two of celery (or just the tops, if you've chopped them up when preparing celery sticks) and a carrot or two. Grab an onion (fresh from the pantry, or the half-an-onion that you put in a ziploc bag when you only needed a half of one yesterday).
Finely chop the vegetables, you want roughly equal amounts. Put a large pot on your stove, turn the heat to medium-low and put in an equivalent amount of tablespoons of butter per cup of veggies. (I know that explanation is crystal-clear, but just in case you're confused, what I mean here is that if you have about 2 cups of veggies then put 2 T of butter in the pan, 3 cups of veggies then 3 T of butter, etc. etc.) Stir this around and let the veggies cook until they are soft and your kitchen smells awesome. Then sprinkle an equivalent number of tablespoons of flour over the veggies and stir until nicely combined. (Again, it's obvious to you I'm sure what I mean here but just in case... if you melted 39 T of butter (because you had 39 cups of vegetables) then you should add 39 T of flour, etc. etc.)
After this mixture has cooked for a minute or two while you've stirred it around, turn the heat down to low and pour in some chicken broth. (I usually don't have chicken broth actually, but if you have some homemade then great, or canned, that's fine too... I generally add the powdered or cubed stuff to water and microwave and stir it up and voila, I have broth!) Again, the same magical match-the-amounts thing applies: add the equivalent amount (in cups this time) of broth to the mixture. Add it slowly and whisk all the time that the broth is going in. It will not glob up and make lumps and be disgusting if you make sure to have the heat on low and add the liquid in a small stream and be sure to whisk all the time. Oh, and chew gum while counting backwards from 30 at the same time, that's the key to a successful soup, believe me!
Just kidding, you don't have to chew the gum. That was a joke.
OK so now go ahead and add another equivalent amount of broth. So actually that means that you are adding DOUBLE the amount of broth.
Math is so cool.
And it's late at night and I'm punchy.
So back to the soup. At this point I would like you to add some turmeric to your yummy soup. This can be to taste, if I am making a full pot of soup to serve about 6 people, then I'd add about a teaspoon. The turmeric will make your soup all beautifully golden yellow and very healthy, and it will also stain your wooden spoon if you aren't careful to immediately rinse it. (This I know by experience.)
You should also add some other lovely herbs at this point. I recommend adding equal amounts of dried parsley, dried thyme, and dried (or rubbed) sage but you can add what you particularly like.
UND NOW, add the frozen meatballs.
Since this is turkey meatball soup it'd be a shame to forget them.
Last step is adding some rice or another small pasta or grain. I suggest brown rice, but that's because I'm all healthy and superior.
Ahem.
Now let the pot of yummyness simmer for about 30-40 minutes until the rice is cooked and the meatballs are heated through.
Sadly, I don't have a photo. You'll just have to imagine it...
Meanwhile here is an image that will certainly inspire you as you prepare soup for your family.
| "May I have some more, sir?" |
Here's what you'll need (ingredients-wise) for a pot of soup that should make 6-8 servings.
- a stalk or two of celery, or just the tops & leaves
- a carrot or two... or three
- an onion, or so
- 3 T flour
- 6 cups chicken broth (or bouillon cubes/granules dissolved in water)
- salt & pepper to taste
- 1 tsp turmeric
- 1 tsp dried parsley
- 1 tsp dried thyme
- 1 tsp dried sage
- 1/2 cup brown rice (or a small pasta like orzo or tiny shells, or quinoa or some other small grain)
- 1 bag of store-bought frozen turkey meatballs or your own homemade meatballs, frozen
Subscribe to:
Posts (Atom)


.jpg)