Related Posts Plugin for WordPress, Blogger...
Showing posts with label She Teaches. Show all posts

Friday, October 7, 2016

You're not meant to be stressed out.

A friend recently came over to talk with me about a new book we are reading together, but we never really made it to the topic of the book ... instead we started talking about life. Being a mom of little people is HARD. Contentment? What's that? Nothing seems to be going like I want it to in my life right now. I feel completely out of control and chaotic all the time. After awhile she brought up something that she was once told when her kids were young: God gently leads those with young. It's true! You can look it up!

He tends his flock like a shepherd: He gathers the lambs in his arms and carries them close to his heart; he gently leads those that have young. Isaiah 40:11

Sometimes I really wish God would put up a big flashing neon sign in my front yard so that when I woke up in the morning I could look out and I would know exactly what I was supposed to do with my day. He doesn't do that of course, but that doesn't mean he isn't leading me - showing me what to do.

Let me give you an example: I teach private lessons out of my home studio. And it's not an easy job like some might think. Sure, I go to work by stepping out of my house into my renovated garage and my children are just a closed door away. And yes, I get to set my own schedule and my own fees. And of course, I adore music, so it's pretty awesome that I can do it for living... but it's not just those things... it's also really hard to be away from my kids when they get home from school and need help with homework and a snack and chores. I am not always able to know what my week's schedule will be because students have their own scheduling problems. And I work so hard to build a solid studio, but I can't control who signs up and who stays for the long-haul. And it can be really discouraging at times... especially when my enrollments aren't where I want them to be! This year has been a lot of that last part: discontentment with my enrollments. Last week I had a brand new student - who hadn't even attended her first lesson - quit!

But you know what?
That very same day I received an email from a current parent, thanking me for being an amazing teacher to her daughter! So... what's the take-away from that? Well... maybe it's that I AM NOT IN CHARGE of who comes through that studio door. And maybe the amount of students that I have is exactly the amount that I should have. Because maybe the key to contentment is to not be stressed out! The way things are now, I can still be with my kids several days of the week to read to them and bake muffins for them and help them vacuum the carpet.

It's not a flashing neon sign but I think I have finally "seen the light!" God is gently leading. He guides the circumstances, closing some doors and opening others. He is reminding me that this is just a chapter of my life. Right now my children are young. They need me too. Maybe someday I will have a huge studio with tons of students. But right now I have been given the gift of still doing what I love, while being able to easily continue in my roll of stay-at-home mom! Working and being a Mom doesn't have to be hard. If God is being gentle with me ... maybe he doesn't want me to be stressed out. Maybe he wants me right where he has me. Doing this. And being okay with it.

So if you are someone with young and you feel out of control and frustrated with what you are doing day-to-day, look for the ways that God is gently leading you. I truly believe that he is putting you in the places you need to be to help you focus on the important stuff.


Just yesterday (one of my non-teaching days!), while working on canning applesauce, I looked out my window and saw my oldest (12) with my youngest (1) taking a walk with a buddy and the stroller. I didn't ask him to do it. He loves his baby brother and he has learned how to make him happy when mom is busy (like when I am teaching!) and he is able to take care of him for me. What more could I ask for? I can be a teacher. I can be a mom. And our family is learning how to make it work.

Thank you, God, for gently leading me to the students I should have, to the schedule I need, and for showing my children how they can love each other and help me and Daddy do what needs to be done. Thank you for being gentle with me. And thank you for helping my children to be gentle with each other. You're a good, good Father.
Make me a good Mother.

Wednesday, October 31, 2012

Chocolate Covered "Pumpkins"

Today we made some chocolate covered pretzels. We used small pretzel knots, dipped in white chocolate that we had colored with orange food coloring. I got this idea from this website and you can view it for a more detailed explanation of how to make these treats. She has great pictures, too!

What you need:
  • Bag of pretzels
  • Orange Food Coloring (I used this stuff because it's awesome)
  • White Chocolate Chips (we bought a small Nestle bag)
  • M&Ms (just the green ones)
  • Oil and/or Butter
Melt your chocolate. I did 1 minute in the microwave and then another 30 seconds until it seemed ready. Don't go too fast or try to melt it all in one go, it won't work! Add some food coloring until you achieve the shade of orange you want. I added some butter and oil to my chocolate to thin it out. The original recipe states that you should use 1 Tbsp of shortening for about 10 oz of chocolate. I estimated and just added until I felt that the chocolate was runny enough. The reason I didn't use shortening is because we don't buy that stuff in our house! I had fine results. The chocolate could have maybe been a bit smoother had I used shortening, but it looks good to my 3-year old and that is all that really matters to me!

Dip the pretzels in the chocolate, lay them out on a cookie sheet and stick a green M&M in the top for a "stem." I let my boy do this part. He had great fun trying to get the M&M to stand up right. He put them wherever he wanted, which was fine with me, but ideally you would want them in the bend at the top of the pretzel to look most like a pumpkin.

If you accidentally overheat your chocolate, you may be able to save it by using these tips.


Another great thing about this activity is you can teach your child at the same time! While I worked on melting the chocolate, etc. my son sorted the M&Ms by color! He chose to eat the brown ones when we were all done!


Wednesday, October 24, 2012

Notes of Thanksgiving

 I have always done a Christmas countdown with my children... but last year my friend pointed me towards an idea for the month of November as well. I have been wanting to do an activity of Thanksgiving with them for awhile now and I decided this would be a great way to do it! I was inspired by this idea and came up with my own plan for a "Give Thanks" board. 

Most of the time when I get a wild hair and decide to create something "crafty" I try to come up with things around the house to use instead of going out to the store and spending more money! So, even though this probably could have looked cuter and been laid out better, I am happy that I could do it with little-to-no cost!

I found a piece of wood in my husband's shop and painted it red. We had some leftover paint from the quart I bought to paint my front door. Since it was red paint, it did require several coats... but it was small and they dried fast! I used a foam paintbrush so that I wouldn't have any brush strokes on the surface.
 
I measured and cut out 30 little pockets out of scraps of scrapbooking cardstock. If you don't know how to cut out envelopes, here is a website that may help you figure it out. Or if you are blessed to have a Cricut, there are several cartridges with envelope designs. Also there are manilla coin envelopes if you want to spend the money but save your time!

I attached them to the board and then added sticker numbers from 1 to 30 for the days of the month. Then I cut more scraps of paper in fall colors and slipped them into each pocket.
Each day in November I will ask my kids to take turns writing something they are thankful for on the papers and we will stick them in the pockets.
 

Pictured with the papers already inserted in each pocket.

Can you tell that my daughter is saying "cheese"? She just learned that one...

p.s. from Emily...  how about taking out all the notes and reading them aloud during your Thanksgiving Dinner?   (Maybe in between courses so no one gets itchy...  you could divide up the cards evenly among all or have the youngest readers in the house do the honors.)


Friday, October 19, 2012

Watch a Caterpillar become a Butterfly


A friend recently posted on FB that she'd brought in three swallowtail caterpillars and her family was watching them go through the incredible process of metamorphosis to become butterflies.  Her post reminded me of the times I've done this with my children, back in the day when all three were younger and still at home.  We've been successful twice, with monarch caterpillars both times!


Here are a few posts from my former blog describing the process:

Meet Tony and Bella.  

They've done it!

and finally,

They're free!


I'm sure you can find a lot of info online about doing this, or in a book you have already sitting on your shelves (this is a great one).

It's not all that complicated really -- the main thing is to observe the plant that the caterpillar is on before you bring it in the house -- that will tell you what food to provide for your temporary resident.  Our monarchs were happily munching away on my butterfly weed (also known as "orange glory flower" or asclepias tuberosa) which is a type of milkweed.  As you probably know, caterpillars love milkweed.

Find yourself an unused, clean jar (mason, mayonnaise, spaghetti sauce, etc.) with a tight-fitting lid and put your new friend in it with a handful of leaves and a stick or two for it to crawl on and eventually make it's chrysalis on.  (Although actually in the case pictured here, the caterpillar attached itself to the underneath of the jar lid!)  Punch a few holes in the lid for airflow.  And of course you'll need to replenish the food every day or whenever the caterpillar eats what you put in the jar.

The only sorta gross part of this process is that your caterpillar will do a lot of going-to-the-bathroom and it will all fall to the bottom of the jar.  It's basically a poop-making machine for the next little while...


It could take a few days or longer for the chrysalis to form -- it all depends on how long into the process your little friend was before you adopted him or her.  In this case pictured here it was only 2 days from when we put the first caterpillar into the jar to when the chrysalis was formed!  The part where they go from caterpillar-clinging-to-a-stick to shiny green chrysalis is soo cool!  Hopefully you can actually watch that part.

The butterfly will emerge in 10-14 days.  Put the jar outside when the chrysalis breaks open and watch the miracle occur!


It may be a bit late for all of you for this year-- but keep this idea in mind for next year!

And if you can't find a caterpillar in your own backyard, here is a place where you can order a "butterfly rearing" kit online.  

Monday, April 30, 2012

Using the Dyed Pasta [Sensory Play AND Fine-Motor Skills Play]

Our last post talked about making dyed pasta to use for all kinds of crafts and activities with your children.

Here's one way you can use your pasta--sorting! As you can see in the pictures, my son used both kitchen tongs and tweezers as he picked up each piece of pasta and dropped them into his dividing tray. Fortunately the colors that I chose to dye the noodles matched the colors in his tray! Love when stuff like that works out!


What ways are you finding to use dyed pasta? ~ Link up your ideas in the comment section below!

Friday, April 27, 2012

Dyed Pasta [Sensory Play, Ep. 3]

Here's another great idea for ways you can help your children learn through Sensory Play! Make some Dyed Pasta! If you have all different kinds of pasta shapes your child can make projects with them. We are going to draw pictures on card stock and glue these pasta bow ties to it. We are also going to use them for sorting and matching colors. It was very easy (though smelly) to make them... I found the directions here. Next time I dye some pasta, I will use tube shaped ones so that we can string them on yarn and pipe cleaners.

You will need: PASTA (duh), RUBBING ALCOHOL, FOOD COLORS and BAGGIES.


Wednesday, April 25, 2012

Patchwork Quilt Inspiration (Yes, someday you will have time for projects like this!)

My mom and I managed to make these a few years back after my holding on to the fabric squares for several years and doing nothing with them... I know you know what I mean!

Dearest mommies of littles, some day you will have time for projects like this, don't despair!

Meanwhile you can dream of time spent at the sewing machine or scrapbook table or with your knitting needles, whiling away the hours happily creating. (Oh and it helps a lot to have a mom, as I mentioned, who is supremely capable and willing to help you finish uncompleted projects!)

[The following is a slightly revised re-post from my old blog.] 


A long time ago I joined a quilt-square swap with other moms from the Five-in-a-Row message boards online. The squares were chosen to each represent a book used in the unit studies. Recently my mom and I finished putting the Before Five-in-a-Row (unit studies for age 2-4) squares together. We did the designing together and she did the sewing on these two.  We decided to group the squares by color theme rather than by another method (say, putting all the books from one volume together).


These three below include squares that represent books from Five-in-a-Row (unit studies for age 4-8). I put the green one together and my mom finished it off for me by adding the backing (which is a nice green fleece -- very warm and cozy!  And no fussing with adding a layer of batting.)


My mom made this blue and red one.


I made this yellow one all my myself! :-)


You may notice we decided to tie these quilts -- I think it is not only is more consistent with the patchwork but it also adds a nice homey quality to them, I think.  Plus it's easy and doesn't take much time at all!

I hope this inspires you, hang in there, some day you will craft again!

We chose today's post for our weekly link-up!


Please visit our She Links Up! page and check out the other places you can go for great recipes, ideas and encouragement!

Wednesday, April 18, 2012

A Tree for All Seasons

I recently came up with a fun way to teach my pre-schooler about the four seasons... and since my older son was home on spring break, he helped out and made one for himself as well! We will call this my Hand-Tree Mobile.

The first thing you will need to do is cut out some cardstock (or some other paper that will withstand paint and glue). We chose to use several shades of blue, mostly because that's what I had! These pieces were 12x12 scrapbook cardstock that I simply cut down the center to form 2 each of 6x12 sheets. Then the messy part begins...
1. Either paint (with a sponge paintbrush) or dip your child's hand in brown paint and help him/her create a hand print towards the top of the paper to form the BRANCHES of the tree.
2. Take a brush and paint on the trunk with more brown paint.
3. While the "tree" is drying choose your decorations for each season.

4. We used a leaf punch that I had from scrap booking, but you could also cut them out by hand or just tear scraps of paper into small "leaves". We punched out several green ones for SUMMER and several orange/red/yellow/brown ones for FALL. Then we chose some flowers in pastel colors (also scrapbook supplies, but you could use stickers or more hand-cut paper) for SPRING. We took some cotton balls and pulled them apart for the snow on our WINTER tree.
5. Once the trees are dry, begin gluing the decorations to each tree. Label them (if you want) and you're almost done!
6. We decided to hang ours from hangers with yarn, but you could also just put them up on the wall, on the window, frame them... whatever! 

Thursday, April 12, 2012

Fine-Motor Skills Play, Ep. 3

Photo Credit
I found an AMAZING site recently that has TONS of ideas for fine-motor skills play with your pre-schooler. The site also includes free printables for the activities.

These ideas focus in on Math. Many of them involve counting and/or matching numbers.

Please visit Growing in Pre-K and try some of these with your children! We would love to see pictures of your creations and hear how much fun your child has with them!

For more ideas, check out our former posts on the subject.
Sorting, Collecting Supplies, Pre-School Activity, Baking Soda Medicine Dropper, Busy Bags

Here is your shopping list to complete the activities suggested on the Growing in Pre-K math website:

  • Printer/Paper/Laminator
  • Clothespins
  • Gems
  • Bingo Chips
  • Foam Shapes/Cubes
  • Coasters
  • Small Manipulatives (erasers, toys, etc. Oriental Trading Co is a great place to start to find these at a cheap price)
  • Bottle Caps
  • Stickers
  • Magnets
  • Coins
  • Trays/Cookie Sheets
  • Pom-Poms

Monday, April 9, 2012

Bathtub Cubes [Sensory Play, Ep. 2]

Here's an idea for bathtime-adventures!

Make up a tray of colored ice cubes... just fill the tray with water (don't fill all the way or your colors will run together) and then add a few drops of food coloring to each one. Stir up a bit and pop it in the freezer. Stick a few cubes in the tub with your kids and they will have a blast chasing them around the tub, watching the bath water change colors as the cubes melt!


Super easy and squeaky-clean fun!

Wednesday, April 4, 2012

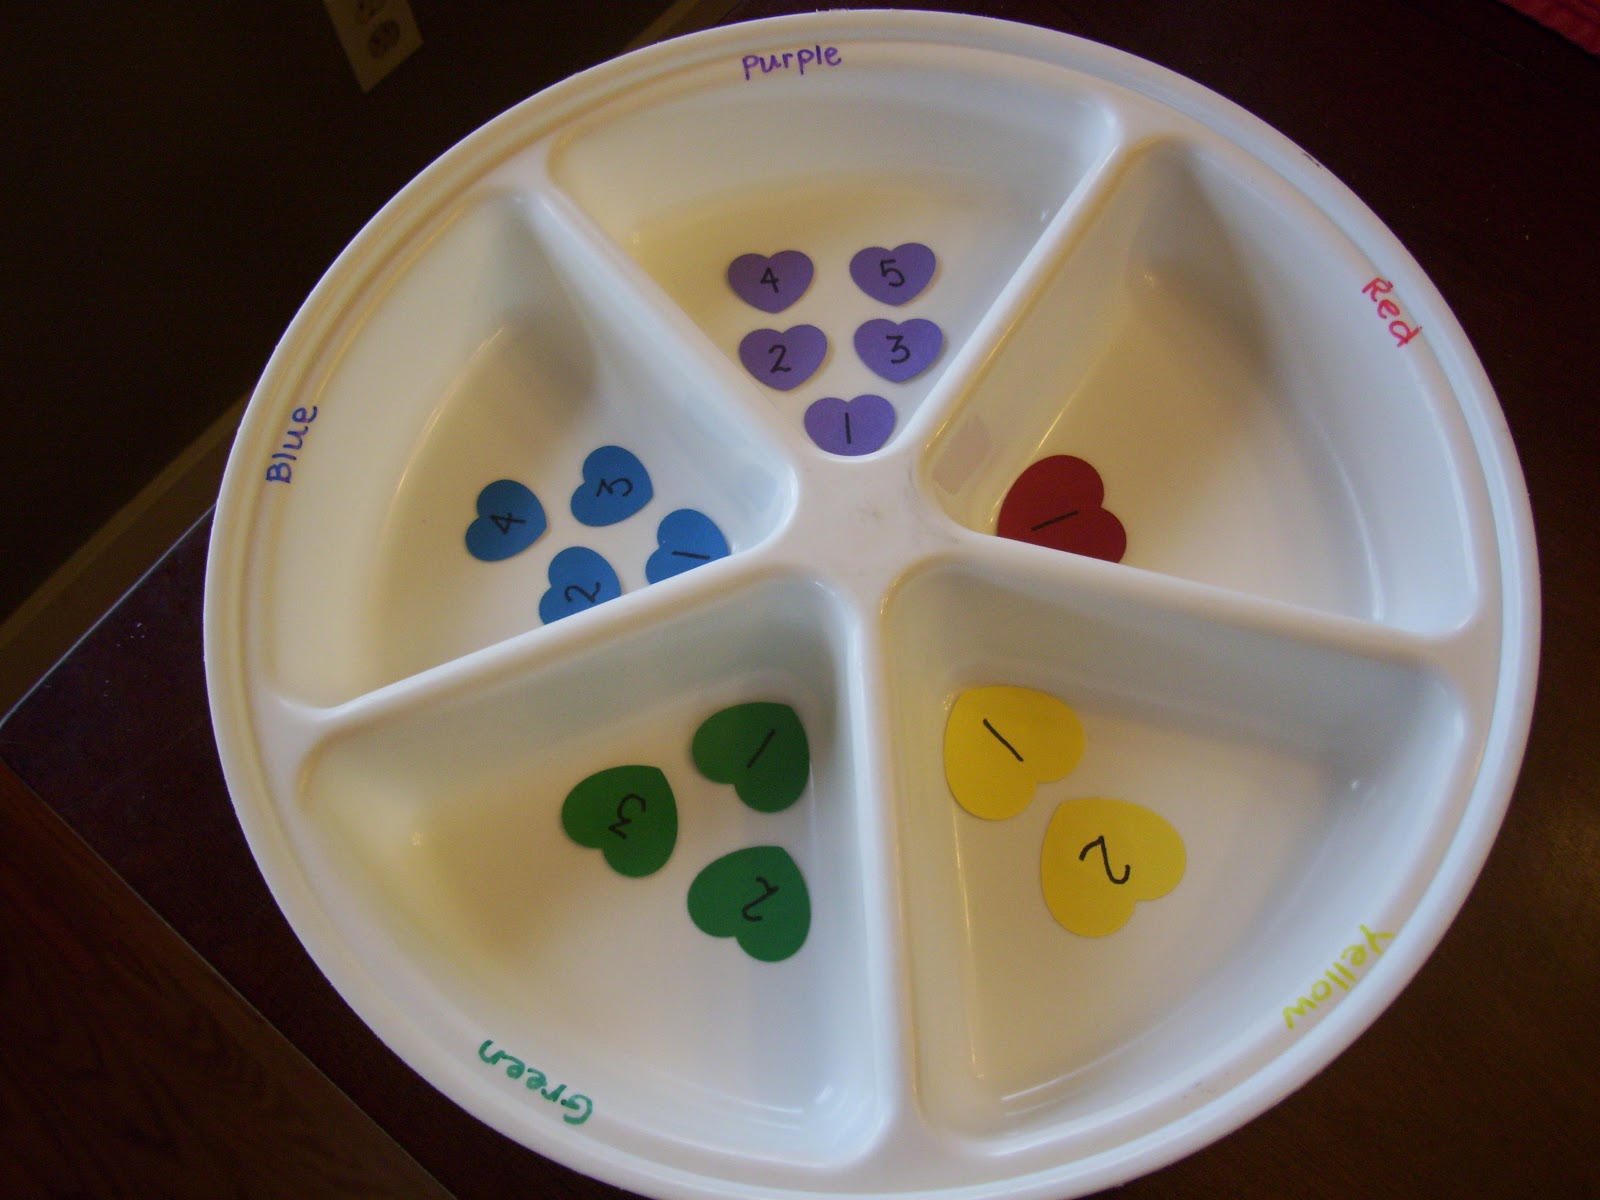
Sorting [Fine-Motor Skills Play, Ep. 2]

Now that you have collected a bunch of items to create activities for your child(ren),
let's get started by talking about sorting!

White divided tray $1 at Goodwill. Craft supplies from
$1 store. Clear divided tray with lid $0.50 at Goodwill.
[Pictured here is sorting pom-poms by number and color.]
"Why is sorting such an important skill to give to preschoolers? If you think about it, a child will go on to sort things for the rest of their life. We are always sorting, clothes, toys, papers, and the list goes on and on. Sorting is a fundamental activity in life for all. To help preschoolers learn sorting is to give them a life skill. Preschoolers can sort by shape, size, color, texture, and category."


1) Gather up items that can be divided by the above suggestions-- shape, size, color, texture and category. Some examples are: buttons, paperclips, erasers, stickers, toy cars, balls, pom-poms, magnetic letters, dried pasta/beans/rice/etc, jelly beans, cereal, cut-out shapes from card stock, LEGOS.

2) Give your child a container to sort them in. Depending on the size of the items you could use anything from an egg carton to an muffin tin to bowls to trays to laundry baskets. If you have purchased items specifically for preschool activities you can alter them to serve different purposes. Buy some ice cube trays and paint each "cube" a different color. Then have your child sort their items according to colors. Write numbers inside the sections and have your child fill each one with the appropriate number. When sorting textures, glue a piece of the fabric inside the compartment they are to match it up with. If sorting letters, draw the letter... you get the idea.

3) If you are sorting large items like clothing or shoes or toys, use painter's tape and lay out a grid on the floor to make sections for the child to gather each item.

4) Go one step further and get a set of tweezers and tongs for your child to pick up each item with as he/she sorts them into categories!

Some items you can RECYCLE for sorting activities:
  • save your bottle caps (they can be painted or glued to magnets or add stickers)
  • broken crayons (use as is--just remove the paper, or you can melt them down and reshape them)
  • muffin tins/cookie sheets
  • plastic cartons and containers
  • Popsicle sticks
  • color swatches from choosing paint colors
  • fabric scraps
  • leftover yarn
  • lonely socks that are missing their pairs
  • doubles of your printed photos (sort family members' faces)
  • magazines (cut out animals, cars, other favorite things)
  • baby food jars (for storing smaller items)
  • plastic utensils and utensil tray
  • clothespins
Don't be overwhelmed!!!

If you don't have time or money or motivation to put together activities... at least remember that

"There are probably many activities you do with your child that help them with sorting skills. If you’re looking for other activities to do at home with your preschooler, here are a few: let them help put dishes away, we do silverware best, help clean up their toys, let them help put groceries away. Laundry sorting has many possibilities. First when it is dirty, let them help sort it into different piles by color, then when it is done sort it by types—shirts, pants, socks, towels, etc.; or sort it by person—mom, dad, brother, sister, etc., lots of sorting skills here."

Quotes from Preschool Playbook

My son can use this tray to sort by color and/or number.

Sorting pom-poms by color.

Friday, March 30, 2012

Collecting Supplies [Fine-Motor Skills Play, Ep. 1]

One of the best ways I have found to teach my children at home includes learning about their world through activities! Help your child prepare for life by encouraging their fine-motor skills. These include hand-eye coordination, focusing and following objects with their eyes, writing, drawing and recognizing objects by touch.

First you will need to collect your supplies. Try visiting your local thrift stores for used kitchen and household items. The Dollar Store is a great place to find manipulatives and craft supplies. Yard sales are a great place to find books, projects, curriculum accessories that people are finished with. Of course you can visit regular stores--but I am definitely trying to accomplish this without spending too much money! :-)

Some items you may want to put on your shopping list:

  • Containers for storing your supplies (bins, baskets, boxes with lids)
  • Trays or Containers for sorting and playing
  • Craft supplies (pipecleaners, pom-poms, stamps, glue, markers, paint, etc)
  • Kitchen Supplies/Utensils (tongs, spoons, collander, etc)
  • Puzzles
  • Playdough
  • Paper
  • Macaroni
  • Beads
  • String/Yarn
  • Clothespins
  • Scissors
  • Cooking/Baking supplies
  • Measuring Cups
  • Fabric Scraps
Other resources for fine-motor skills activities...
Preschool Activity Box
PreKinders
Spaghetti Box Kids

Coming up next: Sorting [Fine-Motor Skills Play, Ep. 2]

Wednesday, March 28, 2012

Baking Soda Medicine Dropper [Sensory Play, Ep. 1]

Here's a fun idea that you can do with your preschooler and you probably have everything you need in your kitchen right now! 

Materials:
  • Baking Soda
  • Vinegar
  • Food Coloring
  • Baking Dish
  • Medicine Dropper
  • 2 Small Bowls
  • One or more really cute kids
Notice that it was a rainy day... :-)
Let your child choose two colors for this activity. My son chose BLUE and ORANGE. Pour some vinegar in the bowls and add the food coloring to each bowl. Stir. Spread some baking soda in the baking dish (as deep as you want, but it doesn't need to be too much).

Have your child practice his fine-motor skills by teaching him/her to pinch the medicine dropper, stick it in the vinegar, let go and then squeeze it on top of the baking soda... they will love to see the colored bubbles erupt! After tiring of this part, forget the medicine dropper and just play in the crunchy crumbly baking soda and mix it all together to make more colors and textures!


Thanks to my friend, Krissy, for this great idea!!!

Thursday, March 22, 2012

Sleep Training Your Baby

For any of you out there that may be thinking about sleep training your baby, I found the videos on this website to be extremely helpful!

Based on the recommendations from this coach, I created my own Baby's Daily Log for keeping track of my daughter's sleeping and eating patterns. I did this for 5 days and then averaged what she did into a schedule that was going to work for her.

Her schedule looks like this: (she is 10 1/2 months old)

Wake/Nurse (whenever she wants--still working on this)
Breakfast at 9:00am
Nurse at 10:30am -- Nap
Wake/Lunch around 12:00pm
Nurse at 1:30pm -- Nap
Wake/Snack around 4:00pm
Dinner/Nurse 7:00pm
Bedtime/Nurse at 8:30pm

Please view my Baby's Daily Log by clicking on this link. You can choose to download and print it if it would be helpful for your experience sleep training as well!

Monday, March 19, 2012

She Tips: Pre-Schooler Sweeper

Here's a great way to help your pre-schooler help you! If you have a sweeper/duster/mop with sections that snap together to make one long handle, take one-two of the sections out and then put it back together. You now have a mini-one just the right size for little helpers! If you don't have one, go get one! I especially find these to be a great choice because of the dry pads and the wet pads. My guy feels like he is helping right alongside Mommy and in reality he is because he is picking up whatever I didn't get when I went over it the first time with my regular mop or broom. :-) Everybody's happy and the floors are getting clean!


Saturday, February 11, 2012

Pre-School Activity Idea

I recently made some busy bags with friends of mine and it has inspired me to continue to come up with ideas to keep my pre-schooler entertained! He keeps saying "I gotta do my homework" then proceeds to scribble on the nearest piece of paper. I am thinking he's ready for some structured learning activities, don't you?

Do you receive TONS of those free address labels in the mail? It seems like we get them once a month around here.... Well, I have a GREAT idea for something you can do with them besides address envelopes...

Cut the little pictures off of the sides of each label. Then create "Matching" or "Pattern" cards for your pre-schooler to work on! Each card can only be used once, but since these stickers are free, I think it's worth it! I placed some of the stickers on the front of the card and then attached the matches or pattern completion pieces to the back of the card [leaving them on the removable backing] with some photo tape. Great fun and good recycling!!!

Give it a try and send me a picture of your little guy or gal matching away!

Tuesday, February 7, 2012

He's My Brother

This mama L-O-V-E, LOVES, having boys. They laugh together. They wrestle. They chase the dog. They ride bikes. They help each other clean up the toys. They read in bed together. They build with LEGOS. They help each other memorize their catechism questions. They cuddle their Mom. They love their baby sister. They are awesome.

Good to remember sometimes.

Tell your son THREE THINGS you like about him at the dinner table tonight. Ask him to tell you things he likes about the other people in your family.

Laugh and Treasure.

The road is long
With many a winding turn
I'm gonna be just like my
big brother some day!
That leads us to who knows where
Who knows where

But I'm strong
Strong enough to carry him
He ain't heavy, he's my brother

So on we go
His welfare is of my concern
No burden is he to bear
We'll get there

For I know
He would not encumber me
He ain't heavy, he's my brother

If I'm laden at all
Then I'm laden with sadness
That everyone's heart
Isn't filled with the gladness
Of love for one another

It's a long, long road
From which there is no return
While we're on the way to there
Why not share

And the load
Doesn't weigh me down at all
He ain't heavy, he's my brother

He's my brother
He Ain't Heavy, He's My Brother


Linking Up:
Join us for Gratituesday at Heavenly Homemakers!

Thursday, February 2, 2012

To Give a Band-Aid is NOT a Boo-Boo!

Sometimes you just need a Band-Aid... 

even if there's nothing really there to cover. I see a little one on the verge of a smile instead of tears. You may argue with me, but to me it's worth it to give my kids a Band-Aid when they have a boo-boo even if they don't really need one--just because it makes them feel better!

 
Sometimes it's even-more-better to have two! (Especially when they make your feet look really cool.) Come to think of it... there's got to be a really good reason that Band-Aids make you feel better, other than the fact that they come with all kinds of fun characters and colors on them.... in fact, check out this website out for proof that it's not a mistake to be generous with the Band-Aids!!! 

Let's take this one step further and involve our kids in making a First-Aid Kit for the home so that they know just where to go when they need a Band-Aid. I found a recommended list of items to be kept in a First-Aid Kit: 
  • Box of assorted sizes of adhesive bandages
  • 1" bandage
  • 2" bandage
  • Package of sterile gauze
  • Sterile non-stick bandages
  • Ipecac syrup
  • Anti-biotic ointment
  • Ace wrap (elastic bandage)
  • Small sharp scissors
  • Tweezers
  • Adhesive tape
  • Needles
  • Matches
  • Hydrocortisone cream
  • Benadryl cream or antibiotic ointment
  • Disposable instant cold pack
  • Alcohol swabs
  • Plastic gloves
  • Emergency phone numbers (doctor, hospital, and poison control)
We use a BRIGHT RED plastic tool box as our First-Aid Kit. It's very easy to describe to my kids when I need them to run and get it. Note: if you plan to keep all of the above items in your kit, don't leave it where little hands can reach it. Instead, create a second First-Aid Kit that is kid-friendly without the items that are dangerous for them to have unsupervised access to.

Tip: Our kids get Band-Aids in their Christmas stockings with their favorite characters on them to use when and however they please. It's great fun and it's great for them!

Let's face it... Boo-Boos happen. But please go and be SAFE! ;-)

Wednesday, February 1, 2012

Encouragement for Mothers


Please head over to this website and read about the author's recent challenge to mothers out there. This topic has been in the forefront of my mind for quite awhile now. I feel like sometimes the ONLY WAY TO GET my kids to listen to me is to YELL. It seems like they just [literally] don't hear me otherwise.

I encourage you to meditate on this as well and see where God is guiding you in how you talk to your children.

Proverbs 15:1 “A gentle answer turns away wrath but a harsh word stirs up anger.”

Tuesday, January 31, 2012

I'll Do It Myself... (The Coat Trick!)

My three-year old insists on doing everything himself. 9 out of 10 times we are out and about his shoes are on the wrong feet. Why? Because "he'll do it himself!" and this mama chooses her battles. While I am all for self-sufficiency... I also want my children to learn when to take care of themselves and when to do what is best for others.

Now that the baby is here, what's best for others (namely me!) is just what my little guy wants! I love having his "help" getting ready to go out and run errands and so yes, I let him put his shoes on incorrectly and I wait patiently while he chooses a hat and gloves and I stand out in the cold while I watch him attempt to clip his own seatbelt into the harness (and then do it for him when he finally gives up!) but the one thing that he hasn't been able to do is put on his coat! That is until now.

I found this post on Heavenly Homemakers with a cute little video of how the author has taught her boys to put on their coat. It's perfect and we love it here at our house!!!

Now if I can just convince him that he doesn't need to try it with ALL of his jackets and coats before we head out the door........