A friend recently came over to talk with me about a new book we are reading together, but we never really made it to the topic of the book ... instead we started talking about life. Being a mom of little people is HARD. Contentment? What's that? Nothing seems to be going like I want it to in my life right now. I feel completely out of control and chaotic all the time. After awhile she brought up something that she was once told when her kids were young: God gently leads those with young. It's true! You can look it up!
He tends his flock like a shepherd: He gathers the lambs in his arms and carries them close to his heart; he gently leads those that have young. Isaiah 40:11
Sometimes I really wish God would put up a big flashing neon sign in my front yard so that when I woke up in the morning I could look out and I would know exactly what I was supposed to do with my day. He doesn't do that of course, but that doesn't mean he isn't leading me - showing me what to do.
Let me give you an example: I teach private lessons out of my home studio. And it's not an easy job like some might think. Sure, I go to work by stepping out of my house into my renovated garage and my children are just a closed door away. And yes, I get to set my own schedule and my own fees. And of course, I adore music, so it's pretty awesome that I can do it for living... but it's not just those things... it's also really hard to be away from my kids when they get home from school and need help with homework and a snack and chores. I am not always able to know what my week's schedule will be because students have their own scheduling problems. And I work so hard to build a solid studio, but I can't control who signs up and who stays for the long-haul. And it can be really discouraging at times... especially when my enrollments aren't where I want them to be! This year has been a lot of that last part: discontentment with my enrollments. Last week I had a brand new student - who hadn't even attended her first lesson - quit!
But you know what?
That very same day I received an email from a current parent, thanking me for being an amazing teacher to her daughter! So... what's the take-away from that? Well... maybe it's that I AM NOT IN CHARGE of who comes through that studio door. And maybe the amount of students that I have is exactly the amount that I should have. Because maybe the key to contentment is to not be stressed out! The way things are now, I can still be with my kids several days of the week to read to them and bake muffins for them and help them vacuum the carpet.
It's not a flashing neon sign but I think I have finally "seen the light!" God is gently leading. He guides the circumstances, closing some doors and opening others. He is reminding me that this is just a chapter of my life. Right now my children are young. They need me too. Maybe someday I will have a huge studio with tons of students. But right now I have been given the gift of still doing what I love, while being able to easily continue in my roll of stay-at-home mom! Working and being a Mom doesn't have to be hard. If God is being gentle with me ... maybe he doesn't want me to be stressed out. Maybe he wants me right where he has me. Doing this. And being okay with it.
So if you are someone with young and you feel out of control and frustrated with what you are doing day-to-day, look for the ways that God is gently leading you. I truly believe that he is putting you in the places you need to be to help you focus on the important stuff.
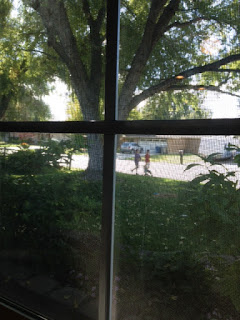
Just yesterday (one of my non-teaching days!), while working on canning applesauce, I looked out my window and saw my oldest (12) with my youngest (1) taking a walk with a buddy and the stroller. I didn't ask him to do it. He loves his baby brother and he has learned how to make him happy when mom is busy (like when I am teaching!) and he is able to take care of him for me. What more could I ask for? I can be a teacher. I can be a mom. And our family is learning how to make it work.
Thank you, God, for gently leading me to the students I should have, to the schedule I need, and for showing my children how they can love each other and help me and Daddy do what needs to be done. Thank you for being gentle with me. And thank you for helping my children to be gentle with each other. You're a good, good Father.
Make me a good Mother.
She Who Makes
...makes for full tummies, warm hearts, beautiful homes, and happy families.
Friday, October 7, 2016
Wednesday, October 5, 2016
Pumpkin Banana Muffins
Baking muffins is seriously one of my most favorite things to do this time of year. And muffins are my kids' favorite thing for me to make! I think that they love the individual portion sizes that muffins provide them. They can get them all by themselves from the container and they are ready to eat with no prep from Mom! So of course I love that, too!
If you have been here before, you have seen our recipe for Pumpkin Chocolate Chip Muffins. Now, when I make anything-pumpkin, I usually LOVE to make my own pumpkin puree but let's be real... now that I have four kids and three of them are in school, there's just not always enough time in the day to do everything from scratch that I want to! So, I buy the pumpkin puree in a can at my local grocery store. Problem is: it's never the right amount of oz for the recipes I am making! I always have leftover puree and I never know what to do with it... until now! I have found another KILLER muffin recipe that solves all my issues with pumpkin in a can!
Pumpkin Banana Muffins
Not only does this recipe only require 3/4 cup of pumpkin puree (the EXACT amount I had sitting in my refrigerator) but it also takes a couple of overripe bananas that I had lying around. This is the best. It is so moist and incredibly flavorful and it combines my kids' two favorites into one glorious muffin.
The recipe is easy to follow and comes out mostly the way it is described. In my experience the muffins needed a little bit longer. I used my stone bake-ware and jumbo muffin cups. It did make 12 large muffins. I love how the recipe has you start at 425 and then lower to 350 - it helps the muffins rise and round up on the top.
Now I have the perfect after school snack for my kids to enjoy forseveral days a day or so! Actually I am not even sure if they will last until tomorrow... I think someone is eating one right now as I type this.
If you have been here before, you have seen our recipe for Pumpkin Chocolate Chip Muffins. Now, when I make anything-pumpkin, I usually LOVE to make my own pumpkin puree but let's be real... now that I have four kids and three of them are in school, there's just not always enough time in the day to do everything from scratch that I want to! So, I buy the pumpkin puree in a can at my local grocery store. Problem is: it's never the right amount of oz for the recipes I am making! I always have leftover puree and I never know what to do with it... until now! I have found another KILLER muffin recipe that solves all my issues with pumpkin in a can!
Pumpkin Banana Muffins
Not only does this recipe only require 3/4 cup of pumpkin puree (the EXACT amount I had sitting in my refrigerator) but it also takes a couple of overripe bananas that I had lying around. This is the best. It is so moist and incredibly flavorful and it combines my kids' two favorites into one glorious muffin.
The recipe is easy to follow and comes out mostly the way it is described. In my experience the muffins needed a little bit longer. I used my stone bake-ware and jumbo muffin cups. It did make 12 large muffins. I love how the recipe has you start at 425 and then lower to 350 - it helps the muffins rise and round up on the top.
Now I have the perfect after school snack for my kids to enjoy for
Thursday, April 25, 2013
How to Store Fruits and Veggies
Just stopping by for a quick HELPFUL tip!
I found this website while pinning the other day. It is so helpful. It is a list of TONS of veggies and fruits that you might have in your kitchen at this moment -- and some you don't because frankly you've never even heard of them!
The list gives you specific instructions for how to prep your produce when you bring it home from the store so that it will last as long as possible in the fridge, counter, pantry, etc. until you can get it eaten up!
Here's an example:
Avocados ‐ place in a paper bag at room temp. To speed up their ripening‐ place an apple in the bag with them.
If you scroll all the way down through the list (it's like 5-6 pages long!!!) you will see a link for printing it so you can store it in a binder with your recipe books. I have a binder of all the "homemade" recipes I need and I stuck it in there for easy reference.
Visit My Thirty Spot and get your list today!!!
Tuesday, April 23, 2013
Bake some Heath Bar Biscotti
A few months ago we had a family over for dinner and she brought me a lovely gift basket filled with treats... special teas, espresso powder, etc. and these delightful homemade biscotti! The recipe has been around a while, apparently she got it out of the Washington Post and it can be found online in several places. I adapted it by leaving the butterscotch extract out and replacing the chopped up candy bar with Heath English Toffee bits. I also used pecan halves... not sure why the original recipe called for whole pecans. Worked just fine and tasted great!
You'll need:
- 1/2 cup vegetable oil
- 1/2 cup granulated sugar
- 1/4 cup light brown sugar, packed
- 1 1/2 teaspoons vanilla extract
- 3 eggs, lightly beaten
- 3 cups all-purpose flour
- 1 3/4 teaspoons baking powder
- Pinch of salt
- 1 1/2 cups Heath English Milk Chocolate Toffee Bits
- 1/2 cup pecan halves
Heat oven to 350 degrees F. Line a large baking sheet with parchment paper.
In a mixing bowl, cream the oil, granulated and brown sugars together until well blended. Stir in vanilla extract. Blend in eggs.
Mix flour, baking powder and salt together and then fold into batter. Fold in toffee bits and pecans.
Place batter on baking sheet (it will be thick and a little sticky) and form it into two logs, each about 10 to 12 inches long about 3 inches in width. (Flatten the logs slightly -- it's more like a long rectangle.) Bake in preheated oven until set, about 25 minutes. Cool very thoroughly.
This was the first batch, tiniest bit underdone. The second batch got a bit more brown. |
With a sharp knife (serrated might work well for you, experiment or you could also try a pizza cutter), slice the logs in strips (about 1/2 to 3/4 inch wide) and return them, cut side down, to baking sheet. Bake in preheated 350 degree F oven first on one side, about 12 minutes, then turn over and bake other side about 5 minutes, or a little longer to desired level of brown. If you bake them a bit longer they will be a bit more crunchy and taste more caramelized, but watch carefully so you don't over-do it and burn them! Cool well.
Thursday, April 18, 2013
Green Monster Smoothie
This is what I had for breakfast.
You are probably wondering two things.
Q1. What in the world is it?
Q2. Why in the world would I drink it?
A1. This is a Vegan Detox Green Monster Smoothie. I got it from Ambitious Kitchen. It is
- 3/4 cup frozen strawberries
- 1/2 cup cucumber peeled, sliced
- 1 large frozen banana, sliced
- 1 1/2 cup milk (I used Vanilla Almond Milk)
- 1 1/2 cup kale, loosely packed (just the leaves--not the stalks!)
- Large handful of Spinach
Throw it all in a high-powered blender and go! It makes a LARGE glassful of smoothie!
A2. I am currently on the Paleo diet... but that's a topic for another day... so this smoothie is perfect for me! Plus it's fast and easy to "eat" breakfast this way... And it does NOT taste like veggies at all. It tastes fresh and smooth and cold. This one is a keeper for sure!
Why should you eat Kale? WebMD says:
"One cup of kale is a good source of minerals copper, potassium, iron, manganese, and phosphorus. Kale’s health benefits are primarily linked to the high concentration and excellent source of antioxidant vitamins A, C, and K -- and sulphur-containing phytonutrients. Carotenoids and flavonoids are the specific types of antioxidants associated with many of the anti-cancer health benefits. Kale is also rich in the eye-health promoting lutein and zeaxanthin compounds. Beyond antioxidants, the fiber content of cruciferous kale binds bile acids and helps lower blood cholesterol levels and reduce the risk of heart disease, especially when kale is cooked instead of raw."Obviously you could use regular cow's milk in this smoothie. The benefit of using almond milk is that it becomes dairy-free and can assist you in getting rid of toxins in your body. You won't miss the milk, I promise! And if you are someone who can't have milk--well then this is just for you!
Tuesday, April 16, 2013
DIY Stain Remover
Okay, wait until you see this! It is awe-some!!!
I hate spending tons of money on special cleaners just so that I can have a million bottles in my cabinet for every little cleaning need. So, I am always looking for more ways to use the same products over and over to make cleaning products to use around the house.
Here's another great one. See these? They are my 4-year old's T-Ball pants from practice this week.
YUCK!
DIY Stain Remover
2/3 cup Dawn Dish Soap
2/3 cup ammonia
6 Tbsp baking soda
2 cups warm water
Mix together and pour into a spray bottle. This tends to separate easily so you'll have to shake it up each time you want to use it. Spray it on the stain and rub! Then wash as normal. Since these are white, I dried them outside in the sun. Here's the result...
Is that amazing or what?!?!?!?!
Subscribe to:
Posts (Atom)