Related Posts Plugin for WordPress, Blogger...
Showing posts with label She Makes Lunch. Show all posts

Wednesday, April 10, 2013

She Has Five Favorites!

Today I am joining in with Moxie Wife and others and writing about a few things I'm loving right now.

1.  Green tea to start my day.  Particularly one that has some kind of fruity flavor added to it.  
I've been a coffee-first-thing-in-the-morning-please-don't-talk-to-me-until-I've-had-my-cup person for decades (pains me to say it) but recently I've replaced that first cup of joe with green tea.  
Makes me happy.
Purple Açai and Blueberry Green Tea Superfruit
2.  Jillian Michaels on the DVD player.  Yeah, she's kinda annoying, and I guess I wouldn't say that She Personally is a Favorite, but her workout program is.  Surprise surprise, breaking a sweat every day (even only for 20-30 minutes) really really improves my mood and overall feeling of well-being.  Yep, you heard it here.  First probably.


3.  Lest you think I'm so last decade with Favorites #2 and #3 let me add Call the Midwife to the list.  Totally awesome show.  I cry over each and every episode.  Watch it online or get the DVDs from Netflix, whatevs, just Watch This Show.
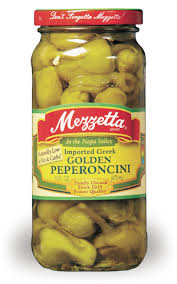

Learn More About the Show


4.  Peperoncini

Current fave way to consume is in a wrap sandwich -- get yourself a wrap of some sort (edible), spread it with a bit of mayo, layer deli turkey, some kind of cheese if you want, spring mix or other kind of green stuff, and then a bunch o' peperoncini. Sprinkle with black pepper, roll up, and enjoy!


5.  Um, I've owned this little gizmo (Pampered Chef Mini-Whipper) for years -- in fact I own two of them -- and only just realized what it's most especially good for.  Even the company's write-up doesn't tell you that if you pour some milk into a small saucepan and put it over medium heat and use this guy to whisk up the milk for all of maybe 20 seconds that you'll have perfectly frothed milk that you can continue to warm and then use to make an awesome homemade latte!  (Just add a few ounces of hot strong coffee or espresso -- I make mine from instant and it works great!) Why I didn't realize this I have no earthly idea.  So don't bother buying yourself a battery-operated milk frother thingy, just use this, which you probably already have and didn't know what it was good for.  Or maybe you do and I'm just the last person to realize...  yeah probably that's it. 


Head on over to Moxie Wife to read up on more Five Favorites!

Wednesday, April 3, 2013

Make Grilled Cheese Roll-ups

Here's a very fun idea for lunch for your kids (and you 'cause they're pretty good!)...

Take a few slices of bread and roll them out really thin. I left the crusts on because my bread was really soft. If you are using a hearty bread you may need to trim the slices down. Once they are really thin, place some pieces of cheese on top and roll from one side to the other. Squeeze them down and place them in melted butter on your skillet. Cook until brown and then flip them over with tongs. Brown the second side and serve them up! P.S. I think these are best with cheddar.


Thanks, Recipe By Photo!

Tuesday, March 19, 2013

Make a Healthy Smoothie

In the last few weeks I have been introducing smoothies to my diet! I have been replacing one meal per day with a healthy, filling smoothie for two reasons:

1) To control my calorie intake
2) To make sure I actually eat something! I don't know about you, but I find it difficult to actually sit down and eat breakfast and lunch some days!

Here are my 2 new favorite smoothies--

Green Reset

Two handfuls of baby spinach, 1 apple, 1 banana, 1 cup of yogurt, 5 strawberries, 1/2 orange. Blend well and enjoy.

I use frozen spinach. I peel and dice my apple. I just dump the peeled banana in. I use less yogurt and it still works. I sometimes use some fresh juiced oranges instead. All options work great. You really can't mess it up! Here are some things I like to add:
  • 1 Tbsp of flaxseed meal and/or
  • 1 Tbsp of wheat germ
  • Small handful of almonds
  • 4 ice cubes (I personally like my smoothies REALLY COLD)


Chocolate Protein Shake


Throw everything in your blender and go until it's smooth.
  • 1 1/2 cups cold milk  (The original recipe calls for chocolate milk, but I just use regular.)
  • 2 scoops protein powder (Laura introduced me to Muscle Milk and it's yummy!)
  • 1 banana
  • 1 Tbsp natural peanut butter (I use ground peanuts)
  • 3-4 ice cubes (I use four for sure, 'cause remember I like my smoothies cold!)

Both are filling and healthy! Who knew you could drink up so much good food in under 5 minutes! Good for us busy mamas...

Tuesday, April 17, 2012

Apple Pie Bars

Thanks, familyfun.go.com!
Here's another great way to make awesome homemade treats for hubbies & kids to pack in their lunches so they can have forkless-desserts on the go!

I am not completely positive what the purpose of the crushed cereal** is in this recipe, but I am glad for an excuse to use up the crumbled bits at the bottom of the bag that no one wants to eat in their bowl! Save them up and bake this yummy treat!

From Family Fun ... visit their website for more GREAT recipe ideas to make with your kids!


          FOR THE CRUST:
  • 2-1/2 cups flour
  • 1/4 teaspoon salt
  • 1 cup butter
  • 1 egg
  • Milk (about 2/3 cup)
FOR THE FILLING:
  • 1-3/4 cups cornflakes**
  • 8 cups peeled and sliced cooking apples (see first tip below)
  • 1 cup sugar
  • 1-1/2 teaspoons cinnamon
  • 1/2 teaspoon nutmeg
FOR THE TOPPINGS:
  • 2 tablespoons sugar
  • 1/2 teaspoon cinnamon
  • 1 cup confectioners' sugar
  • 2 tablespoons milk
  • 1/2 teaspoon vanilla extract

  1. In a medium-size bowl, stir together the flour and salt. Using a pastry blender or two knives, cut the butter into the flour until the mixture is crumbly. Separate the egg yolk and white, reserving both parts. Beat the yolk in a liquid measuring cup, then add enough milk to measure 2/3 cup and blend well. With a fork, stir together the yolk-milk mixture and flour mixture until the ingredients form a sticky dough. Halve the dough and flatten each half into a 3/4-inch-thick disk. Cover the disks in plastic wrap and refrigerate them until well chilled, at least 30 minutes.
  2. Heat the oven to 350 degrees. Pour the cornflakes into a plastic bag and use a rolling pin to lightly crush them.
  3. On a sheet of waxed paper, roll one portion of dough into a 15-1/2- by 10-1/2-inch rectangle. Transfer the dough to an ungreased 15- by 10-inch jelly roll pan. Sprinkle the crushed cereal over the dough, then layer on the apple slices.
  4. Roll out the remaining dough as in Step 3. In a small bowl, mix the sugar, cinnamon, and nutmeg for the filling. Sprinkle the mixture over the apples, then lay the dough on top. Use the tines of a fork to seal the dough edges.
  5. In a small bowl, use a fork to beat the reserved egg white until foamy, then brush it over the dough. In another small bowl, stir together the sugar and cinnamon for the topping and sprinkle it on the crust.
  6. Bake the pastry until lightly browned, about 50 to 55 minutes. Let it cool for an hour, then mix the confectioners' sugar, milk, and vanilla extract to make a glaze and drizzle it over the top. When the dish has completely cooled, cut it into bars and serve.

Friday, March 9, 2012

Stone Ground (Cheesy) Grits

A while back I was talking with a family member and the subject of grits came up.

"What are grits?," she asked.

I 'bout fell over.  (Well not really, but I enjoyed saying that.)

And then I tried to explain...  "Well really grits are kinda like cornmeal but not really but they are made from corn and you cook 'em and they are yummy, especially if you add things like butter and cheese..."  So yeah, I don't think she was convinced.

Grits are (for me) one of those things that I'm most grateful to North Carolina to, for introducing me.  (Bad sentence but I think you get what I'm saying here.)  Along with barbeque (the shredded pork, vinegar, no-tomato-sauce variety), hush puppies, sausage gravy & biscuits...  I know you probably want me to say okra but I'm not going to. But all the other stuff, yeah.  Sooo good, as they say.

Recently Trader Joe's added stone ground grits to their store offerings and yeah baby, these are gooood!!  Please, find yourself some stone ground grits real soon and make 'em.  You will love them, your family will love them, and yup, they (your family) will love you ever so much more so!

[Side note.  I don't really know much about all of this, health benefits of grits and such, I mean they are basically corn and corn has gotten kind of a bad rap lately... but if you are interested here is a comparison of the health benefits of oatmeal vs. grits.  And here is an article explaining that if you are going to have, please, for the love of all that is good in this world, have the stone-ground kind.)

[Side note II.  I have no photo.  This is because I couldn't stand to run upstairs and get my camera and Not Eat the Grits Right Now.  So I ate the grits.  And did not take a photo.  Twice, actually, if we are going to be honest here, I ate the grits without taking a photo.  I promise, the third time, I will take a photo and add it to this poor little photo-less post.]

[UPDATE:  I added a photo.]

Stone Ground Cheesy Grits
(recipe from the back of Trader Joe's bag of Stone Ground White Grits)

You'll need:
  • 1 1/2 c water
  • 1/4 t salt (or to taste)
  • 1 T butter
  • 1/2 c stone ground grits
  • 1/2 c milk
  • 1/2 shredded cheese (sharp cheddar is good, but whatever you have will probably work)
  • several grinds black pepper (to taste)
In a large pot, combine the water, salt and butter.  Bring to a boil.

Gradually stir in the grits.  Let the water return to a boil and then lower the heat as low as possible.  (Note, you may almost have to turn the burner off.  Come back and check in a few minutes and see whether you need to turn the pan down or back up just a bit -- you want a very very low simmer.)  Cook the grits, covered, stirring every 5 minutes or so, for about 15 minutes.  Then pour in the milk and stir a bunch more times, letting the mixture simmer gently (you may have to raise the heat just a bit) for about 10 more minutes, stirring every couple of minutes, until all the liquid is absorbed.  Add the cheese and stir until melted and combined.  Add several grinds of black pepper (to taste) and stir again.

Try not to immediately eat the whole pan of grits since this recipe is supposed to serve 3-4.  In my house it's enough for me and my husband which is 2.

Add an over-easy egg and a piece of fruit (or glass of juice) and you are all set for your day!

What is your favorite way to eat grits?


Friday, February 24, 2012

She Makes Lunch: Lunches for Kids

Packing school lunches and making lunches at home each day is not my favorite task. Some people really enjoy it, like this woman, who documented the lunches that she made for her son each day in photos. She is SO CREATIVE! Take a few minutes to look at her collection. If you hover over the items in the photos, she describes them for you. She has great ideas for a variety of lunch items that are perfect for little ones. She also left notes in her son's lunchbox for him to read each day, which is so sweet!

I hope this revives your daily lunch-making abilities!

P.S. Here's another great idea for those of you who pack school lunches!!! I am putting one of these on my wishlist! ;-)

P.P.S. Thanks, Bethany, for sharing this with me!!!

Friday, January 6, 2012

Broccoli and Cheese Soup

I've been looking for a great broccoli cheese soup for some time now, because you know, you can't always go to Panera when you have a hankering for yummy & healthy soup!  This one works for me -- it's slightly adapted from the recipe found here.

You'll need:
  • 2 c chicken broth (I use 2 c water + bouillon cube/granules)
  • 1 small onion, diced
  • 1 small carrot, grated
  • 1/3 c flour
  • 1/4 c butter
  • 1/2 t pepper
  • 1/2 t salt
  • 2 c milk
  • 2 c shredded cheddar cheese (or combination of 2/3 cheddar and 1/3 swiss)
  • 3 c steamed & chopped broccoli (I use a full bag of pre-cut & ready-to-steam)
Here's what you do:
  1. Put the chicken broth (or water+bouillon) in a small saucepan and add the diced onion and grated carrot. Cover and bring to a boil.  Simmer for about 20 minutes, until the veggies are soft.  
  2. Meanwhile, heat the milk in the microwave for about 2 minutes.
  3. While the broth & veggies are simmering and the milk is warming, melt the butter in a larger heavy-bottomed pot.  When the butter is melted, whisk in the flour, salt & pepper.  Stir and cook over medium heat for a few minutes and then whisk in the warmed milk.  Cook and stir this mixture over medium heat for another few minutes, until it's nice and thick.  Turn down the heat while you...
  4. Put the broccoli in the microwave to steam for a few minutes. (Either directly in the bag or in a glass bowl if you are using an actual head of broccoli that you have already chopped up small.)
  5. Add the chicken broth (which should be almost ready by now) to the milk mixture and whisk some more until the entire mixture is well blended, adjusting the heat as needed.
  6. Add the shredded cheese to the soup.
  7. Remove the broccoli from the microwave and give it a rough chop if needed (you can do this in the bag if you want, just pull away the packaging and have at it). 
  8. Add the broccoli to the soup, make sure it's good and hot, and serve! 


She Links Up:

Comfy in the Kitchen

Women Living Well


Tuesday, November 15, 2011

The "I'm-Still-An-Adult-Even-Though-I'm-A-Mom" Sandwich

Tired of having peanut butter and jelly every day? Eat this:


What you will need:
  • 1-2 slices of really nice bread or roll (depending on whether you want a whole or half sandwich) -- I used some homemade bread here.
  • 1 slice of deli meat
  • Cheese (I prefer sharp cheddar)
  • Crumbled Feta
  • Pickles
  • Any other "gourmet-ish" condiments that you enjoy (peppercinis, jalapenos, olives, cucumbers, etc.)
  • George Foreman Grill
Stack everything inside your bread slices and press them with your GFG until the cheese is melty-goodness.
Lots of good flavors.
Lots of warm gooey stuff.
Makes for a happy mama!

Click here for Printable

What else would be good smashed between two pieces of bread?


Thursday, October 20, 2011

She Makes Lunch: Spaghetti Pancake

We often boil more spaghetti noodles than we can eat for dinner just so we have leftovers -- my two girls love Spaghetti Pancake for lunch the next day!

You'll need:
  • leftover cooked spaghetti noodles (amounts will vary, at least a few cups)
  • grated parmesan cheese (about 1/4 c. -- you want to put more in there than you think)
  • dried herbs: 1/2 tsp oregano, 1/2 tsp basil
  • salt & pepper to taste
  • 1 egg
Dump all of the above into a bowl.


Stir everything up real well with a fork.  Heat a bit of olive oil on a skillet and spoon the noodle mixture onto the skillet, flatten the whole mess out into a "pancake".


Cook for several minutes on medium-high heat until browned and crispy.  Divide the pancake into 4 equal pieces with a spatula and then flip each section.


Let the other side cook until crispy and browned... and serve.


Add some fresh fruit or veggies and you have an easy and tasty lunch that your older child can prepare on her own!


What's your favorite way to creatively use-up-leftovers?

Tuesday, October 11, 2011

Homemade Tortilla Chips

If you've never tried this you should very soon.  Homemade tortilla chips are easy and so worth the little bit of time and effort!  Trust me, make these for your family and they will love you ever so much more so!

You will need:
  • a package of corn tortillas
  • canola oil (I imagine you could use another kind but this is what I use)
  • salt
  • a large, deep, heavy bottomed pan -- here I am using a "wok"-style one and it works great!  [Note: for safety's sake make sure your pan is completely dry before using!!]
  • a cookie sheet, covered with two layers of paper towels
  • kitchen tongs

Grab your package of tortillas.
Take 1/2 of the package and cut the pile into sixths.
Pour an inch or so of oil into the (dry!!) pan, turn the heat to medium-high.

You want the oil to be hot enough so that the chips will cook in about 3-4 minutes.
When you think the oil is hot enough,
CAREFULLY slide a tortilla piece into the pan to test the temperature.
If bubbles start forming immediately around the piece of tortilla, the oil is ready.


When the oil is hot enough, CAREFULLY slide (don't plop or throw, slide!) about 10-12 more tortilla pieces into the oil.  Probably don't do more than 15 at a time or they won't cook quickly enough.
Let them brown for 1-2 minutes and then carefully turn each one with the tongs.
After another 2 minutes or so they should look nicely browned and crispy!

Here's what they look like after being removed from the pan.
Take them out carefully one-by-one and gently shake off the extra oil back into the pan.
Place on the paper-towel lined cookie sheet.
After you've taken all the chips out of the pan immediately shake on salt to taste.

Then add another batch to the pan.
Go ahead and cut up the remaining 1/2 of the tortilla package while these are cooking.

In the end you'll have a lovely pile of freshly made, warm & crispy tortilla chips!  Yum!!

TIP:  Many grocery stores sell large packages of 100 count white corn tortillas.  Separate this large bag into freezer bags of 15-20 tortillas each and put into the freezer -- they defrost just fine in the fridge for when you need 'em, and you save money and time by buying in bulk. 

ANOTHER TIP:  You an re-use the oil for another time -- let it cool COMPLETELY and pour carefully into a mason jar for storage.  You can strain out the pieces if you want to but I usually don't bother with this step, I just don't pour the last bits out of the pan into the jar.   I store my tortilla-chip oil in a back corner of my fridge.  It can be re-used more than once.


Best served with homemade salsa!