Related Posts Plugin for WordPress, Blogger...
Showing posts with label She Organizes. Show all posts

Thursday, September 27, 2012

Create a Menu Board

Here I go again, trying another way of keeping myself on track with meal planning!
This time my attempt looks pretty, so maybe it will work...

Supplies needed:
  • 8x10 picture frame (find one at a yard sale or thrift store, you are going to cover it anyway so it doesn't matter what it looks like!)
  • Scrapbook or other patterned papers
  • Black card stock
  • 2 solid colors of card stock
  • Very small cardboard box (I used a box that was leftover from photo tabs.)
  • Stickers
  • Letter stickers (or a marker!)
  • Accessories (as desired)
  • Mod-Podge and a foam brush
  • 8 Clothespins
  • Circle punch
  • Card stock for menu cards (as much as you would like, cut into 1x3 strips)
  • Computer labels or a pen (to add your menus to the cards)
  • Glue dots or hot glue

1.  Clean the frame (unless you bought one brand new) and prepare to cover it by taking out the backing and glass.

2.  Rip your scrapbook paper into random strips and mod-podge them all over the front of the frame. Wrap the strips around the edges and continue to glue them down.

3.  While that is drying, punch out 11 circles and add the S, M, T, W, H (I used this for Thursday), F, S and spell out M, E, N, U on two different colors of cardstock.

4.  Cut a piece of black card stock to the 8x10 size and glue your MENU circles to the side of it. Glue the circles to the clothespins, leaving one extra clothespin to decorate and add separately.

5.  When the frame is completely dry, glue the 7-day clothespins to the left side of the frame.  TIP: Start with "W" and put it in the middle of the frame and then work out from there so that everything is centered.

6.  Now it's time to decorate and cover the little cardboard box. Do that however you want. Insert the glass, black card stock and backing into the frame. Glue the cardboard box to the glass leaving enough room to put your Menu Cards into the clothespins next to it. I added the 8th clothespin to the top right hand corner so that I could stick on encouragement verses, schedules, recipe cards, etc. to my board whenever I wanted. It just balances things out and adds some personalization.

If you make your own Menu Board, send us a picture and we'll post it!
Send your photos to shewhomakes@gmail.com

Now...off to plan my menu for the week!!


Saturday, June 2, 2012

Our new Shelf!

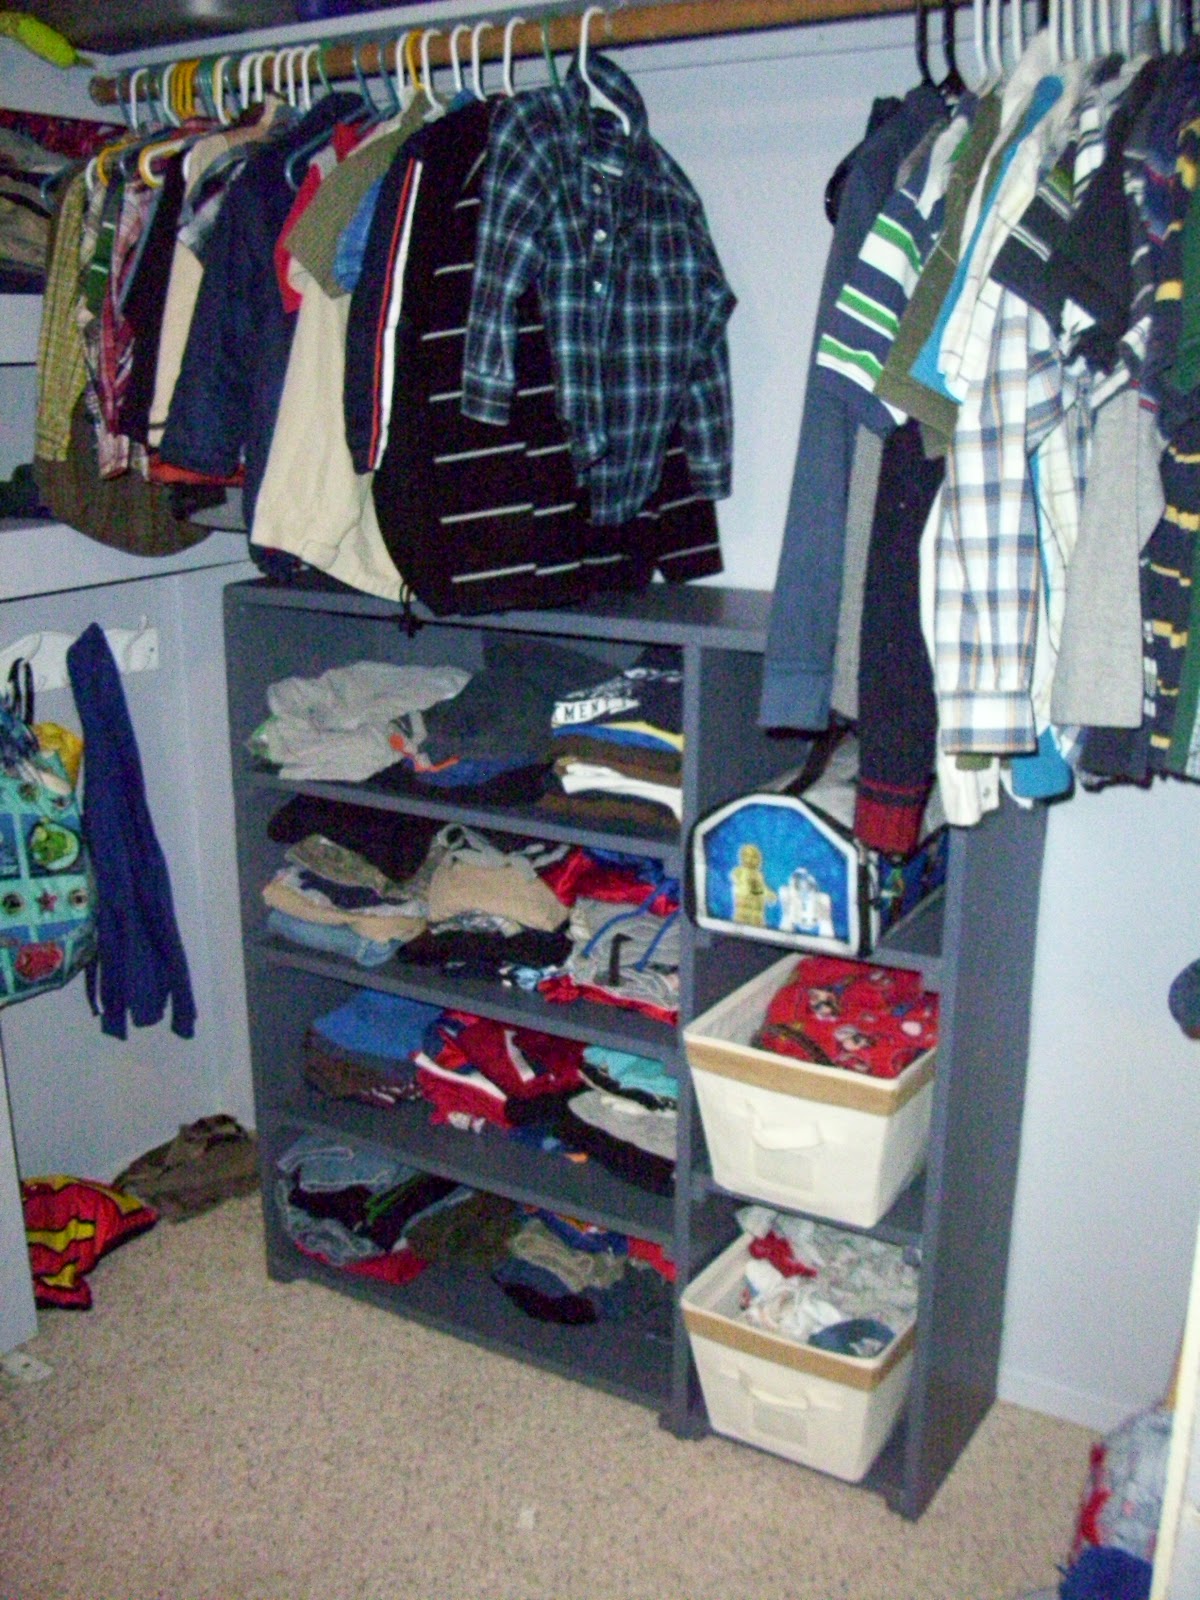
Here is how the Ugly Green Bookshelf turned out in the end. What do you think?


So far it seems to be working very well for holding the boys' clothes. Definitely easier to get them to put their clothes on the shelf then to try and open and close the drawers.

Now just to keep them from climbing on it...

Wednesday, May 23, 2012

The Ugly Green Bookshelf

So, my middle child likes to break things. He averages one item (usually it belongs to me) per day. Recently he broke an entire dresser. He apparently thought that pulling out the drawers like steps and then climbing up to reach the clothes on the hangers would be a good idea. Of course in the middle of doing that he also broke the hangers...

He's okay. No blood.

But the dresser is not.

Instead of purchasing another one and spending like $100, I decided to buy this from a thrift store for $12.


Stay tuned for what I do with it....

Saturday, March 17, 2012

She Organizes: Bills Binder

We have recently began using Dave Ramsey's tips from Financial Peace University to get our finances in order and hopefully plan for our family's future in a more responsible way! We are really enjoying all that we are learning and are so excited about our commitment!

This has of course caused lots of changes to the budget, bill paying, decision-making in our house and I sought out ways to make this easier on me [cuz I have a lot to be in charge of these days!!!]

I read about creating a Bills Binder at Echoes of Laughter and thought it would be the perfect solution! I have made my own and would like to share it with you...

I keep my binder by my laptop so that I can grab it whenever I am working on the finances. Here is what the inside of my binder looks like:


Inside Front Cover: Upcoming Bills, To-Dos, Return Address Labels, Other Misc.


Zipper Pouch: Pens, Pencils, WhiteOut, Red Marker, Stamps, Check Book, Envelopes


Calendar Pages: Write the amount of each Bill on the day it is due. I put stickers on the days we will receive a paycheck.


Dividers: Separate the bills into dividers.

The process:
  1. When a bill comes in the mail, take the paystub and the envelope and place them in the front inside cover of the binder. 3-Ring hole punch the statement and file it in the appropriate divider.
  2. Take out a pen and the calendar page. Write the amount to be paid on the date the bill is due.
  3. When it is time to pay the bill, take out the red marker and draw a line through the amount due on the calendar page. Write your check. Place it in the mail (or pay online) and then with the red marker, write "paid" on the statement with the date and amount, if different from the statement.
  4. You're done! You have kept good records. It's all in one place and will be easy to find when tax time rolls around.

P.S. If you are concerned for my safety... the bill pictured above is from an account that is CLOSED since that's the whole point of Dave Ramsey's plan anyway! Yay for us!

P.P.S. You can find free printable calendars HERE.

Monday, March 12, 2012

Homemade Baby Wipes

I was reading an article that Heather on Want What You Have wrote about making your own homemade baby wipes and decided to give it a try! As you can see from other posts that I have been writing, I am very "into" making as much from scratch as I possibly can. It's been really fun researching online and looking for more ideas on how I can be self-sufficient in the home. This recipe for baby wipes was the one I decided to try because it didn't require me to go to the store at all! I had everything available to me in my pantry/bathroom! Good thing, because I am about to run out of baby wipes and I don't have any coupons this month to get them cheap! The best things about this recipe are how inexpensive it is as well as the fact that you know what you're wiping your babe's bum-bum with!

I will share the recipe with you, but please visit her website to read about the discoveries she has made regarding different paper towel choices, containers, etc.  At this point, being new to this idea--I of course am no expert, but will definitely let you know how it goes and if I make any changes to my baby-wipe-making!

You will need:
  • 1 large paper towel roll
  • 2 Tbsp Canola Oil
  • 2 Tbsp Baby Wash
  • 2 1/2 cups Hot Water
  • Large Knife/Cutting Board
  • Container for Wipes
Cut the paper towels in half. Place half roll in container. Mix up oil, baby wash, hot water and pour over the wipes. Pour slowly at the beginning because it will splatter! Put the lid on, turn it upside-down and wait a few minutes. Open it back up and pull out the cardboard tube. Start the wipes from the center of the roll. I put some baby "bath" stickers on my container just like Heather... mostly so my husband doesn't get confused since he's used to me keeping this kind of container in the kitchen!

Wednesday, March 7, 2012

Family Organization Station

Some of you may remember my Chores Chart that used to reside on the front of my refrigerator... well now that my younger son has reached the phase I like to call  
"I'll Do It Myself and/or Exactly Like My Brother"
I needed to come up with something slightly different to accommodate his shortness. So I came up with this idea after visiting several sites on Pinterest that included photos of people's message centers/calendars/offices, etc. Here is what I came up with! Sorry the picture isn't great... once again the lack of natural light in this part of my house is so frustrating!

This picture is of the side of my kitchen cabinet that ends the kitchen area and begins the hallway/living room. This is a central location in our home which works great! The top/left frame is scrapbook paper and a blank calendar behind the frame's glass. I use fine-tip dry erase markers to write on the dates and events. The top/right frame is the same thing, except I just used a blank area with the title "Notes" on the top of the page where I can write reminders, phone numbers, notes for my family. ~ Underneath the frames I mounted a cookie sheet to the cabinet with some scrapbook papers glued to the front. Makes a great ledge for my markers as well as the perfect spot for our chore magnets! The boys can view the magnets that are placed on the "Chores" side each day and when they complete them, they move them to the other side to show that the jobs are completed.

No help from Mama needed, not to mention that my little guy gets to copy big brother in the process!

Wednesday, February 22, 2012

Lenten Challenge: 40 Bags in 40 Days!


As we enter into the Lenten Season, I have a challenge for you.

This time of year should be an opportunity to simplify. Strip things down to the basics. Remove distractions from your day so that you will hopefully have more time and space to focus on preparing for the coming of Easter!

So how about this -- on each one of the 40 days of Lent, collect a bag of "stuff" from one of 40 different areas in your home.  Once you have your (big or small!) bag full, you can then toss, recycle, or donate the stuff in it!  A simple step to achieve more freedom from the too-much-stuff that may be in your life.

[Note: Lent includes the days that start with Ash Wednesday and end on Holy Saturday (the day before Easter Sunday), except for Sundays!  Sunday is a feast day and is not part of Lent.  You can read more here.]  

Consider praying for the people that come to mind as you go through your home.  Use this exercise as an opportunity to be grateful for all the blessings in your life.  As you go through home and your day, pray about anything that is concerning you -- leaving that concern where it should be, with your loving Father! 

Here are the 40 areas in my house that I hope to collect from -- this list should give you some ideas for what you might do in your own home. As you can see from my list, I didn't necessarily come up with 40 separate locations to clean up!  Some of them are too big to do in one day or in one bag, so I gave myself a couple of days to do them. 

I can't wait to get started!


40 Bags in 40 Days
  1. Junk Drawer in Kitchen   
  2. Toy Cabinets in Living Room  
  3. Storage Drawers in LR 
  4. Linen Closet 
  5. Baby Girl's Closet 
  6. Baby Girl's Bedroom 
  7. My Closet 
  8. My Closet, Pt. II 
  9. My Bedroom  
  10. Boys’ Closet 
  11. Boys’ Bedroom 
  12. Boys’ Dresser 
  13. Bathroom Cabinets 
  14. Laundry Room/Cabinets 
  15. Utility Area in Studio 
  16. Pantry 
  17. Pantry, Pt. II 
  18. Pantry, Pt. III 
  19. Desk 
  20. Scrapbooking Lower Cabinets 
  21. Scrapbooking Upper Cabinets 
  22. Filing Cabinet 
  23. Front Porch 
  24. Back Patio 
  25. Shop 
  26. Shop, Pt. II 
  27. Shop, Pt. III 
  28. Shed 
  29. Shed, Pt. II 
  30. Shed, Pt. III 
  31. Front yard / Back yard 
  32. Minivan 
  33. Jeep 
  34. Truck 1 
  35. Truck 2 
  36. Kitchen Cabinets 
  37. Bookshelves 
  38. Attic 
  39. Attic, Pt. II 
  40. Attic, Pt. III

Sunday, August 28, 2011

Chores Chart


I finished my chores chart this morning! I had already finished and blogged about my Morning Routine chart for my 7 year old. I made my Chores Chart to go with it. I am excited about my homemade magnets and may have to change over the Morning Routine Chart to use magnets also, we'll see how we like using it first.

Each day I will place the magnets that list the chores I want my boys to complete on their portion of the chart. When they complete the chore, they can move the magnet back off the chart to show me that it is completed. Then I can inspect their work. ;-)

Here are my homemade magnets--written out for the 7 year old and in picture form for the 2 1/2 year old. You can make them too, after a quick trip to your local craft store for some Glass Gems (mine were found near the marbles for flower vases) and some Tacky Dot Magnets (mine are Arlene's brand, pack of 24). I even have some glass gems leftover for when I think of some new chores!

Modge Podge the back of the gem in order to glue the chore
circle to the gem and still be able to see through it.

Place the chore circle on the back of the gem. Once it is dry
use scissors to trim away the paper that is sticking off the
side. Each gem is unique and will require more or less
trimming. Doesn't have to be perfect, you can't see the edges!

Let the gems dry!

Flip them over and stick on a tacky dot.

Chores are written or done with clip art based on age.

The chores to be done today!!!

Linked to:


Saturday, August 27, 2011

Gotta Love a Routine!

So our oldest child is 7. According to him, he's 37. That kid is too smart for his own good and at the same time completely unfocused, unless of course some form of media is powered up--he has no trouble at all paying attention to me to the TV/Computer/Wii, etc.

Now that school has started back up again, I am fired up to get back to my favorite thing in the whole wide world: a ROUTINE! This year I want to help both my 2nd grader and my Toddler-Almost-Pre-Schooler with responsibilities in the morning (including personal hygiene-man are boys stinky!) as well as chores for the evening. I want them to learn that they are a part of this family and should contribute just like Mommy and Daddy do! (Plus they are the ones that make all the messes anyway.) The best place to start is with a good morning. So that's what we're going to do!

"Lazy hands bring poverty, but hard-working hands bring riches." Proverbs 10:4


Each school day after he completes his morning routine, my 7 year old gets to take a flower that says "One Hour" out of the pocket and place it on the chart. One for each school day of the week. He only earns his 60-minutes of media bliss if he completes all six of his morning jobs. Hopefully he will be dressed and ready for school on time and I will only have to put up with Super Mario background music for 5 hours a week........

Now, on to my Chores Chart...